This activity combines learning to use a map and compass in a scavenger hunt format. It can be a standalone indoor activity, or an introduction to the fundamentals of orienteering. This is an exceptionally economical and easy to prepare activity if you have access to a printer.
Disclaimer: We have no financial ties and receive no financial support or free/discounted supplies from any company mentioned in this post. All recommendations come from our personal experience. We make no money from any links we include.
Supplies
- White printer paper
- 12x Sheets of construction paper
- 4x Sheets of 8.5″x11″ (or A4-sized) white card stock (optional)
Per team of two students:
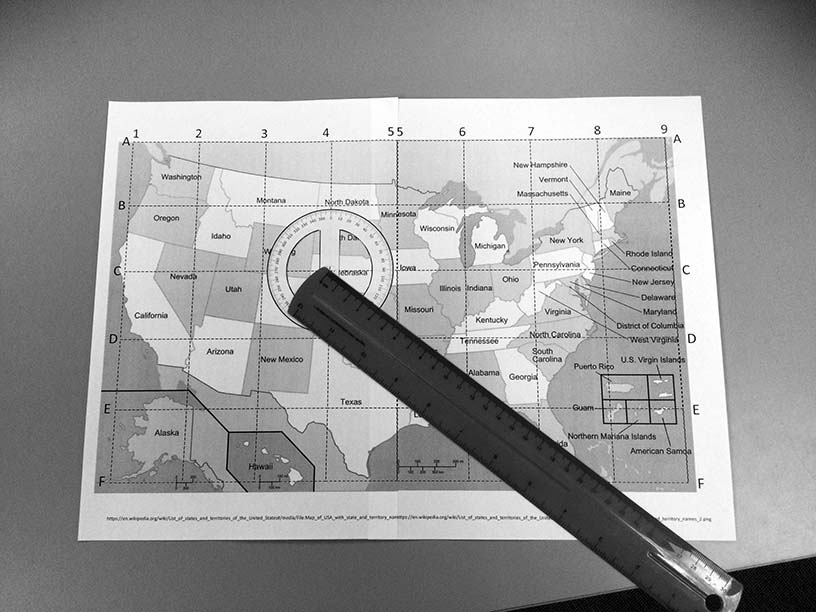
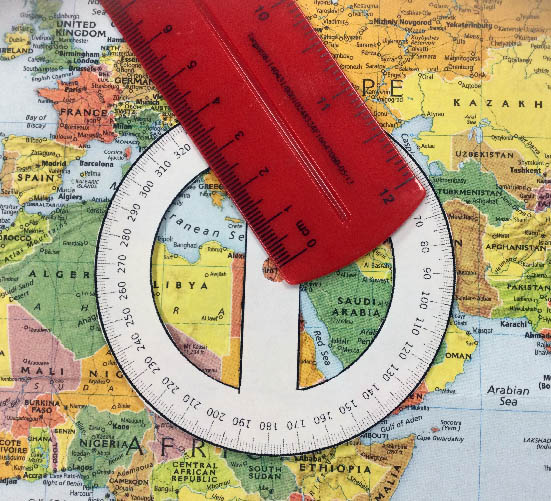
- Ruler marked in millimeters
- Compass protractor
- Pencil
- Clue Sheet
- Guide sheet or field guide
- Map (or share of a map)
Printables
The cut-out protractor template, identification guides, practice worksheet, clue sheet & map templates, example map and its corresponding clue sheet and answer key can be downloaded using the button below.
Preparation
Maps & Protractors
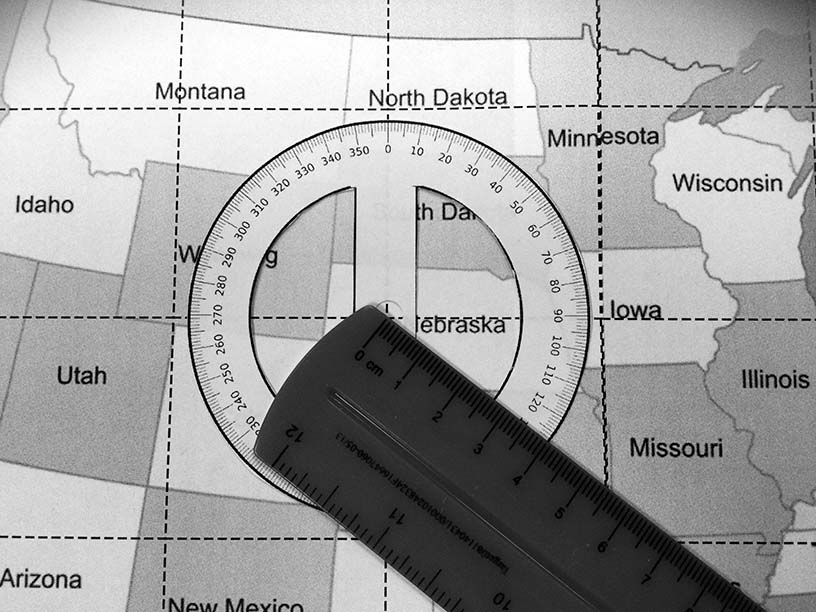
A homemade paper 360° protractor has advantages over commercial transparent models. The paper is usually thinner than rigid plastic, which makes it easier to hold the ruler in place. Text from the map shows through the marks on transparent protractors, sometimes making it difficult to read the degrees accurately.
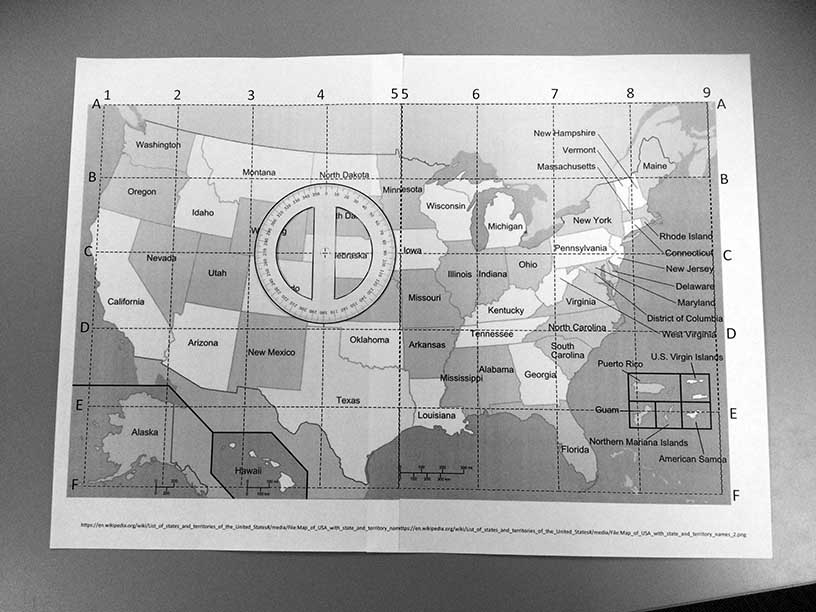
You have several options for maps. Your easiest and most economical option is to print the provided two-sheet United States map in black and white. Assemble one map for every team. Completed clue and destination answers for this map are also included. This is probably the best option for younger students. If you choose this option skip, the “Using Your Own Maps” section and continue reading at the “Other Prep” section.
Using Your Own Maps
Any map will work as long as you can acquire at least four, preferably six, copies per twelve teams. We use colorful world maps collected over the years from Doctors Without Borders solicitations. State maps are usually available at no or low cost from Departments of Transportation, offices of tourism, and welcome stations.
Success in this activity requires aligning the 0° to 180° line on the protractor with a north/south line on the map. Aligning the 90° to 270° line with an east/west line works just as well. To make alignment easier, choose starting point cities on world maps that sit on a longitude or a latitude line. If your map has grid lines marked by letters and numbers, choose starting points on intersections of those lines regardless of whether there is a community at that location. If your map has no grid lines, consider marking a north-south or an east-west line through your starting points using a very sharp pencil. Make the line just long enough to permit aligning the protractor. We have also provided a template for applying such a grid to a digital map of your choice for subsequent printing.
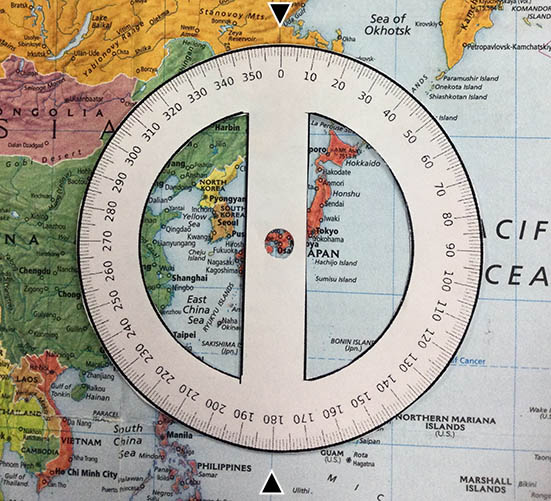

Once you’ve selected your starting points, determine your 24 destinations. On world maps choose countries, aiming for the center of the country to maximize your students’ chance for success. The farther away the destination is from starting point the more crucial accurately measuring the degrees is, so choose larger targets in those situations. Slender countries like Laos, Eritrea, or Chile can be a challenge, as are tiny countries like Monaco, Lesotho, or Qatar. On state maps choose larger cities, larger bodies of water, substantial parks, or counties. Double-check your measurements, then enter your starting points, degrees, and distances into the clue and answer sheets’ tables.
Other Prep
Print one clues sheet for each team. Circle a different odd number on each sheet. Teams will start with the circled clue and seek destinations in numerical order. This reduces time spent waiting for folders.
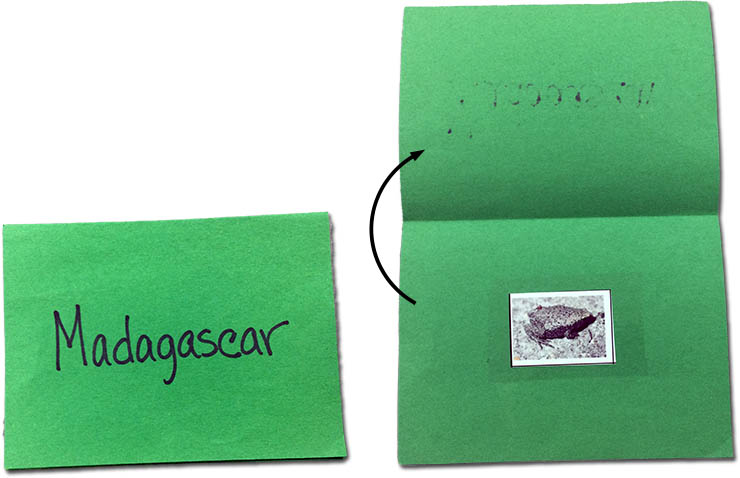
Cut 12 pieces of construction paper crosswise, then fold each piece in half crosswise. Find color pictures of your 24 chosen species and glue one on the inside of each. Label the outside with a destination. Enter starting points, degrees, distances, destinations and species into your answer table.
Animal and plant pictures can be found through internet searches. You may also find sites with extensive archives of pictures and info. For example, bplant.org‘s plant database is a fantastic resource. Let us know if you find similar sites for other categories!
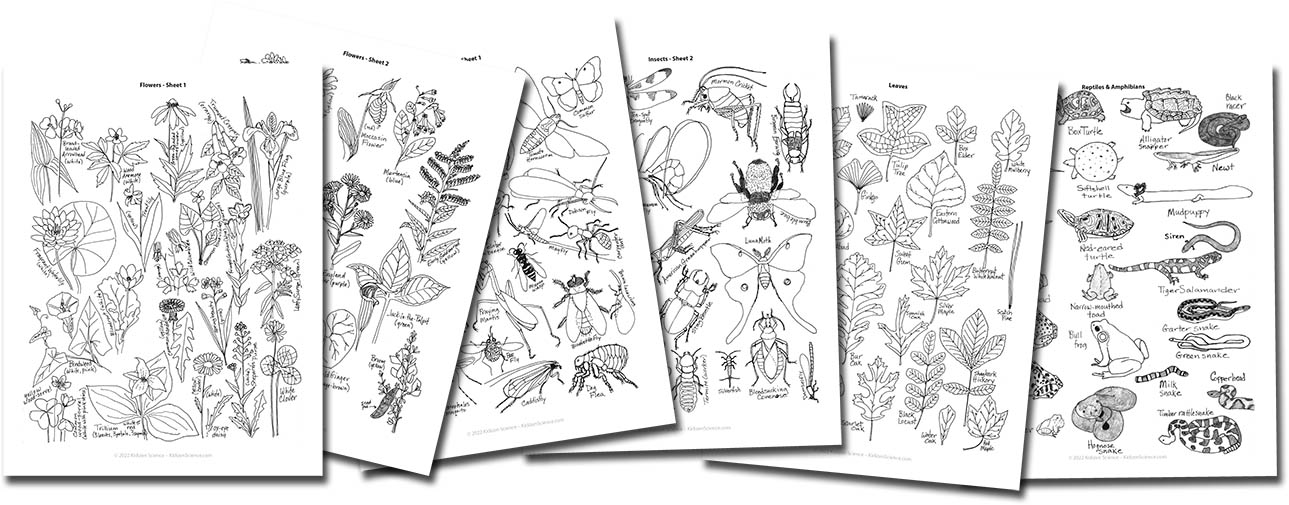
There is, of course, no limit to who or what your students must identify as long as you have 24 unique items. We’ve provided guide sheets for common insects, tree leaves, reptiles and amphibians, and wildflowers. Print one sheet (or pair of sheets, in the case of wildflowers or insects) per team unless you are using commercial field guides or resources. A single sheet is easier to use than a book. Black and white pictures require children to pay attention to shapes and anatomical details rather than relying solely on color.
If you prefer commercial guides, every team needs a copy, but they need not be the same one as long as each guide includes all your chosen species. Look for used book offers. Your local library is also a source.
Suitable choices for nature field guides include:
- Pocket Naturalist Guide (published by Waterford Press)
- Golden Guides (published by St. Martin’s Press)
- National Audubon Society First Field Guides (published by Scholastic)
- Peterson First Guides (published by Houghton Mifflin Company)
Our personal favorite is the Pocket Naturalist Guide series. Like the single sheet guides, these folded, laminated guides are much easier to use than books, especially for the younger students.
Room Preparation
Locate all of the folders in one place. If teams will be sharing maps, provide a home base for each team with maps located elsewhere. Alternatively, cluster teams sharing a map.
Running the Module
Introduction
Explain to the teams that they are going on a hunt. They will use a 360° protractor, also called a compass protractor or land compass, and a ruler to find locations on a map. Each location has a folder with the picture of a (insect, tree leaf, reptile or amphibian, or wildflower) inside. The challenge is to find as many locations, and identify as many (insects, tree leaves, reptiles and amphibians, or wildflowers) as possible.
Using the map of Wisconsin, show teams how to correctly place and align the protractor and ruler. As a group, find the first county. Remind students to check that the protractor is aligned before every measurement, then allow teams to find the other three counties on their own. Check answers.
The Activity
Instruct successful teams to start the hunt, beginning with the clue circled on their clue sheet and continuing in numerical order. If using world maps show how to align with longitude or latitude lines. If maps are shared remind students to study the folders’ pictures at their home bases, and return folders before seeking the next destination. Ask teams who didn’t find the correct counties to demonstrate their technique for you. Correct errors, then release them to the hunt once you’re confident they know what to do.
During the last five minutes either distribute answer sheets, or read out the answers.
How did your young explorers do? Did you make any changes or additions to the activity that works well? Found a particularly good map or picture database? We’d love to hear about it. Leave a comment or send us an email!


0 Comments