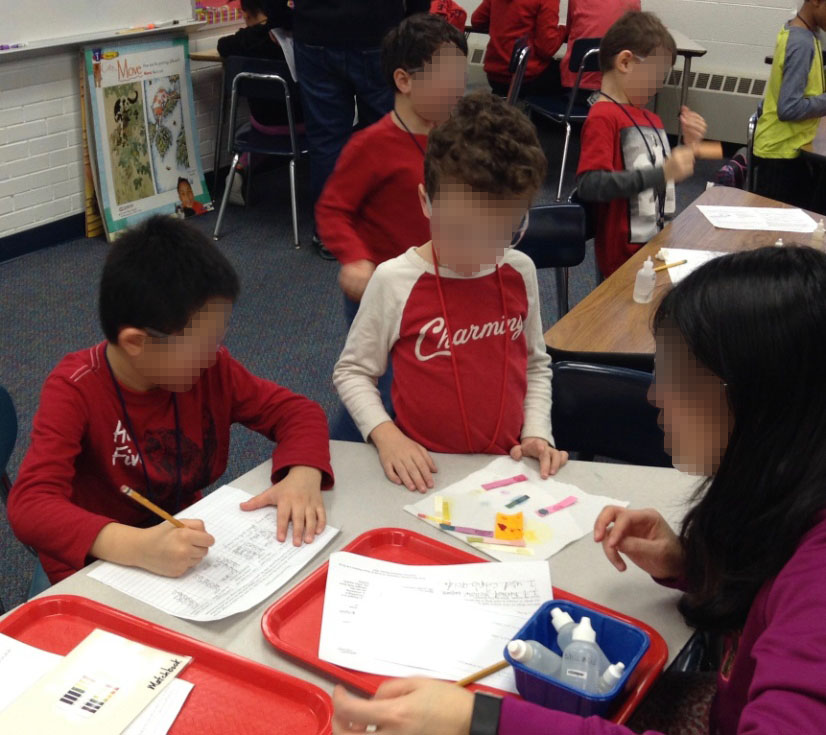
How can you tell how acidic or basic something is? Touching or tasting it could be dangerous or unpleasant. In this activity, students use indicator papers made from familiar fruits & vegetables to see which are the best at measuring pH.
Supplies Needed
Reusable
Paper Preparation:
- Scissors
- Metal cookie-cooling racks or a line and clothes pins
- Small sauce pan
- Rubber spatula or scraper
- Small glass or metal bowls
- Small strainer
- Grater (optional)
- Small kitchen knife
- Pencil
- Snack-sized zipper bags
The Activity:
- Dropper bottles with vinegar*
- Dropper bottles with sodium bicarbonate solution*
- Pencils
*Ideally one per two pairs of students
Consumable
Paper Preparation:
- White absorbent paper**
- Tap water
- Small quantities of colorful fruits and vegetables (see below)
**Such as chromatography paper, filter paper, or plain white paper
The Activity:
- Record sheets
- Commercial pH paper (optional)
Fruits & Vegetables
Good colorful fruits and vegetables include, but are not limited to:
- Red cherries
- Red, black, and purple grapes
- Currants
- Strawberries
- Blueberries
- Raspberries
- Blackberries
- Orange peel
- Cranberry
- Pomegranate seeds
- Tomato
- Red cabbage (see below)
- Red and yellow onion skins
- Carrots
- Red, orange, yellow, and green bell papers (see below)
- Beets (see below)
- Black beans (see below)
- Spinach or other dark, leafy greens
- Turmeric powder
- Chili powder
- Paprika powder
Red Cabbage: You can usually just purchase one or two tough, but very purple, outer leaves.
Bell Peppers: Avoid using hot peppers unless you have rubber/latex/nitrile/etc gloves and are extremely careful not to get the juice in your eyes, nose, lips, or under your fingernails!
Beets: Use the liquid from canned beets.
Black Beans: Use the liquid you cook dried black beans in.
Preparation
Normally, the students only perform the testing, making for a nice and quick 30 minute activity. Because of the time required and the heat and messes involved, the indicator papers are prepared ahead of time. If you have older kids and the ability to run a multi-day event, you could consider having the students make the papers on one day, letting them dry overnight, then testing them on a later day. Each team of students would be assigned to make a batch of indicator papers for one of the fruits/vegetables/spices, which would then be distributed among the other teams for testing.
Preparing the Papers
Cut your paper into convenient sizes. Keep in mind that you’ll eventually cut the paper into strips ½ inch wide by 2 inches long. Mark each piece in pencil with a fruit, spice, or vegetable.
Extract juice from your fruits, spices, and vegetables. An ounce or two of juice can produce quite a lot of indicator paper. Suggestions for each of the items on the list follow, but feel free to experiment, especially with the amount of water you start with. Be careful not to let your concoctions boil dry, but you do want the volume to reduce to ¼ cup or less.
Cabbage leaves, greens, and onion skins- cut finely and simmer gently with a half cup of water until the liquid is highly colored.
Carrots: Scrape or grate an inch or two of carrot into a half cup of water. Simmer gently until the liquid is colored.
Orange peel: Grate orange peel into a half cup of water. Simmer gently until the liquid is colored.
Spices: Start with a level teaspoon of spice in a half cup of water. Simmer gently until the liquid is colored.
Berries: Squash a few berries in a quarter cup of boiling water. You probably won’t need to cook the berries.
Grapes: Mash a few grapes into a half cup of water. Simmer gently until the liquid is colored.
Peppers: Dice and squash two or three square inches of pepper in a half cup of water. Simmer gently until the liquid is colored.
Coloring the Papers
Place a labeled piece(s) of paper on a cookie rack. It’s a good idea to place the rack on a cookie tray or on several layers of newspaper to protect your counter top or table from stains. Spoon the colored liquid into a strainer held over the paper. When the liquid has been absorbed allow the paper to dry thoroughly on the rack, or use clothespins to hang the sheets from a line.
Tomato: smear mashed tomato or tomato paste on the paper. Let sit awhile, scrape off solids
When completely dry cut the colored paper into ½ inch by 2 inch long strips and store in labeled snack size zipper bags. Freshly prepared papers work best, but most still perform after months of storage. If your papers are older than a year, test before your activity to determine which need replacement.
Turmeric indicator paper, in particular, stays viable for quite a long time.

Running the Module
Introduction
pH (which stands for “potential of hydrogen” or “power of hydrogen”) is used to denote how acidic or basic an aqueous (“in water”) solution is. A pH of 7 is neutral, such as pure, distilled water: neither acidic nor basic. (Note, though, that minerals and such present in your water can turn it acidic or basic). The lower the pH of a solution (<7) the more acidic it is, and the higher the pH (>7) the more basic or alkaline it is. Strong acids will have low numbers, and strong bases will have high numbers. Some familiar examples and their pH are shown on the scale below:

Make sure your students understand the difference between a color change and the paper merely turning dark because it’s wet. You might use a piece of colored paper and some water to demonstrate.
- Students may not even be aware if they are colorblind. Pay careful attention to whether a student is having difficulty with these tasks, or if their answers differ significantly from the majority.
- Like any disability, students should never feel ashamed for being color vision deficient. It does not make them any less “smart” or valuable. It only means that they perceive some colors differently — and may have a harder time distinguishing certain colors — than most people. The 10% of humanity that is colorblind is spread across all walks of life! (50% of Kidizen Science is colorblind, too! Stephen’s colorblindness actually makes him better at distinguishing fine differences in lightness/darkness of a color or shade of gray than his “normal” vision companions.)
If you have any color vision deficient students — and chances are you do — consider pairing them with a non-color vision deficient group mate. Emphasize that their answers aren’t “wrong”, rather, their eyes just perceive the world in a different way. (But, like Stephen, they should probably not rely on using pH paper in situations that really matter.)
Testing
Students should work in pairs. Teams obtain one piece of indicator paper at a time. Using a pencil they mark “A” on one end, “B” on the other.
Older students should enter the name of the fruit, spice, or vegetable into the record sheet while younger students might use sheets with the names already entered.
Students add one drop of vinegar to the “A” side and one drop of sodium bicarbonate solution to the “B” side. After a minute they record the results. Older students could record the actual color while younger students might just record “yes” or “no” for change or no change, respectively.
If you have commercial pH testing papers, students can test them as well, to see how they compare to the homemade versions. Commercial papers come with their own color scales, which can be used to determine what the pH of each solution is. Commercial papers are inexpensive, just search for “pH paper”.
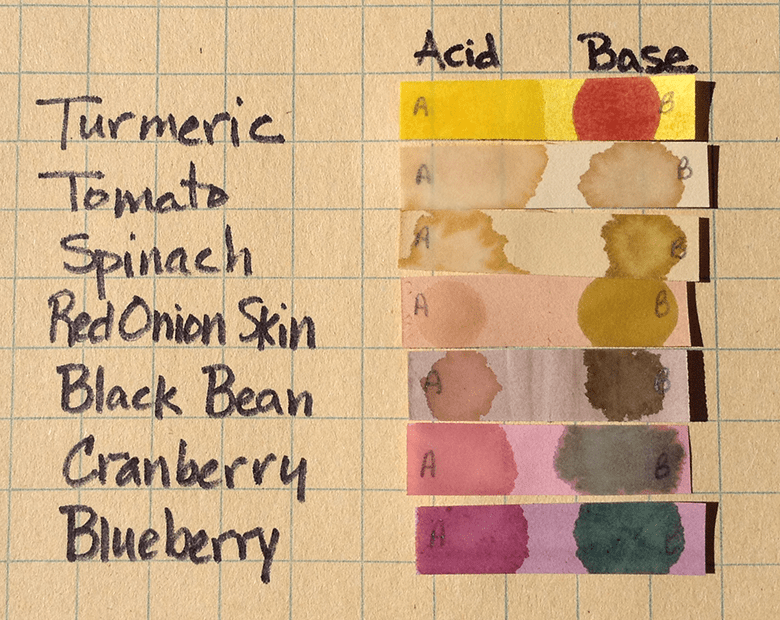
The photos below show results from our various homemade indicator papers, labeled by which fruit/vegetable/spice was used to make them:

Discussion
You will be able to gather the children for this discussion since they’ll have had time to test all the papers. What worked best?
For most people the strongest color change is turmeric — going from light yellow to dark orange. Almost as strong are cranberry — going from pink to blue-green — and blueberry — going from purple to blue-green. This is because of their high amounts of the compounds curcumin (in turmeric) or anthocyanin (in the two berries), as discussed below.
The above ranking was determined by Cynthia, who has either “normal” color vision (“trichromat”) or potentially a tetrachromat (additional color cones!). Stephen, however, is a strong protanope (“dichromat”, very red-deficient), and has always had great difficulty using pH indicators. To him, the strongest change is still turmeric, but the next easiest changes to see were red onion then black bean! Blue-vs-purple is very difficult for him to tell apart, and he instead tends to rely more on lightness/darkness comparisons than differences in hue.
The answer is the same reason what you want to choose highly colorful fruits & vegetables: it’s all about the molecules that give them their color! In the case of plants like cranberries, black rice, beets, or violets, these are anthocyanin pigments, while in the spice turmeric, it is curcumin. Like other dye and pigment molecules, they absorb or reflect only certain wavelengths (colors) of light. Which colors get absorbed vs. reflected depends on the molecule’s structure. What makes anthocyanins and curcumin so useful is that they change their structure depending on the pH of the solution they are in (i.e., how acidic or basic it is), and the resulting new structures absorb different wavelengths (colors)! The photo below shows anthocyanins extracted from red cabbage in different pH solutions, from lower (left) to higher (right).

This effect is more than a novelty. Some actual commercial pH test strips are made using curcumin. This shouldn’t be too surprising given how strong a color change even the homemade curcumin strips produced. (They also remained usable for much longer than the anthocyanin-based strips we made.)
What fruits, vegetables, or spices did you use to make your papers? Did you find something worked particularly well? Have a preparation method that really did the trick? Do share it in the comments!


0 Comments