A mysterious white powder! What could it be? Our young investigators will sleuth out the identities of the mystery mixtures by first building an “answer key” for how the individual “known” powders react to a variety of tests. Then they’ll use this key to figure out what pair of powders are in each unknown mixture by subjecting them to these same tests.
Supplies Needed
Reusable
- 10x Test tubes
- 1x Test tube holder
- 1x Syringe or calibrated eyedropper
- 10x Stirring sticks
- 1x Pencil
- 2x Safety glasses or goggles
(per pair of students)
Consumable
Testing Chemicals:
- Water
- Bromothymol blue
- Vinegar
Powders:
- Starch
- Plaster of Paris
- Salt
- Talc
- Baking soda
- Citric acid
(Alternatives listed below)
Printable
- Instruction card
- Record sheet
- Chemical cards
(per pair of students)
Testing Supplies
Test Tubes
Small test tubes are the best tools to use for this module. The hands down best ones to use are rimless, glass culture tubes, 4-5ml in capacity. If you buy them in lots of 1000 they’ll cost 4 cents or less each. These are considered disposable items in labs so ask around. You may find a lab, school, or company willing to donate some unused ones to you, or donate used tubes that aren’t contaminated with anything hazardous that you can wash.
You can also use spot or well plates but reusable, durable ones can cost $10.00 or more each. Children often contaminate the samples, and get the samples confused easily. If you use spot plates you will need to label each spot or well before loading with the powder samples. Adjust the amount of water added by the children to correspond to your particular plate. Be prepared for dropped plates, and for children to overfill spots with water, ruining the entire plate of samples.
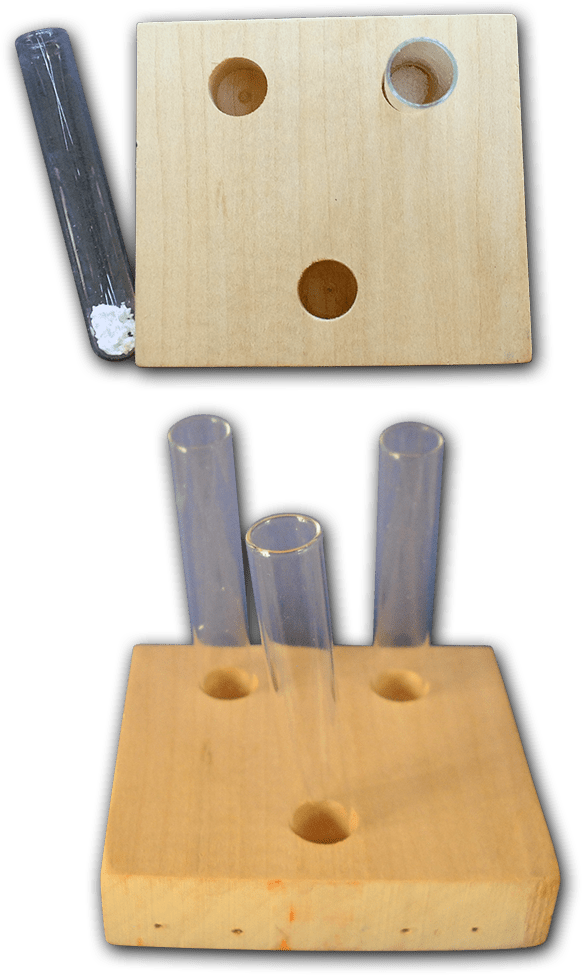
Test Tube Holders
Simple but effective test tube holders can be made out of economy grade 1×3 furring strips or any scrap wood. Children can see the entire contents of the tubes, and the blocks cannot tip over easily. These holders take up little storage space. Cut the furring strip into three inch long lengths. Use a drill bit just slightly larger than the diameter of your test tubes. A Forstner bit is the best choice, but a brad tip wood drill works too. Drill a hole in the center of the block about half an inch deep. Place a test tube in the hole. If the tube doesn’t tip over you’re good. If the tube seems a bit tippy drill the hole a wee bit deeper and test again. You want the hole just deep enough to secure the test tube without hiding too much of it. If you are using a brad tip bit you might pierce the underside; just make sure that hole isn’t large enough to let the tube fall through the block.
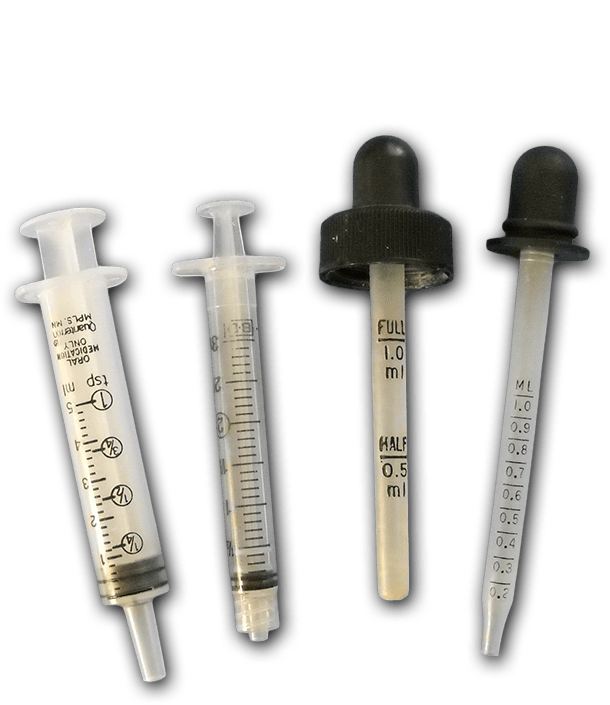
Syringes / Eyedroppers
These tools are the easiest way for children to deliver a reasonably accurate amount of liquid with minimum spills. Syringes are the least expensive: for example, about 14¢ each for 100 x 10 ml syringes and about 60¢ each in smaller quantities. You can also clean and reuse syringes and droppers that come with over the counter medicines. Plastic transfer pipettes are less kid-friendly, and prone to result in mischief. They are also difficult to clean thoroughly for reuse.
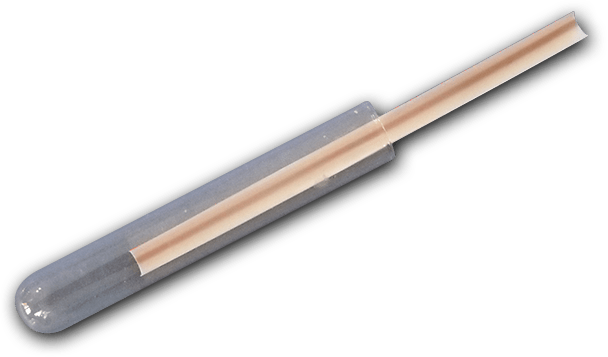
Stirring Sticks
New or reused plastic coffee stirrers work well. You can also cut plastic drinking straws into lengths about 2 inches longer than the test tubes are long. Cut these in half lengthwise to make reusable stirrers.
Bromothymol Blue
Bromothymol blue can be purchased from places like Amazon. Divide larger bottles of bromothymol blue solution into tiny dropper bottles, one per pair of students if possible. A good source of tiny bottles is washed and reused bottles from eye drops and contact lens cleaners. Always remember to remove all product labels before reusing a bottle. Dropper bottles allow good control, and if tipped over won’t spill. You can purchase small empty plastic dropper bottles for reasonable prices, for example fifty 1 ounce bottles for $7.
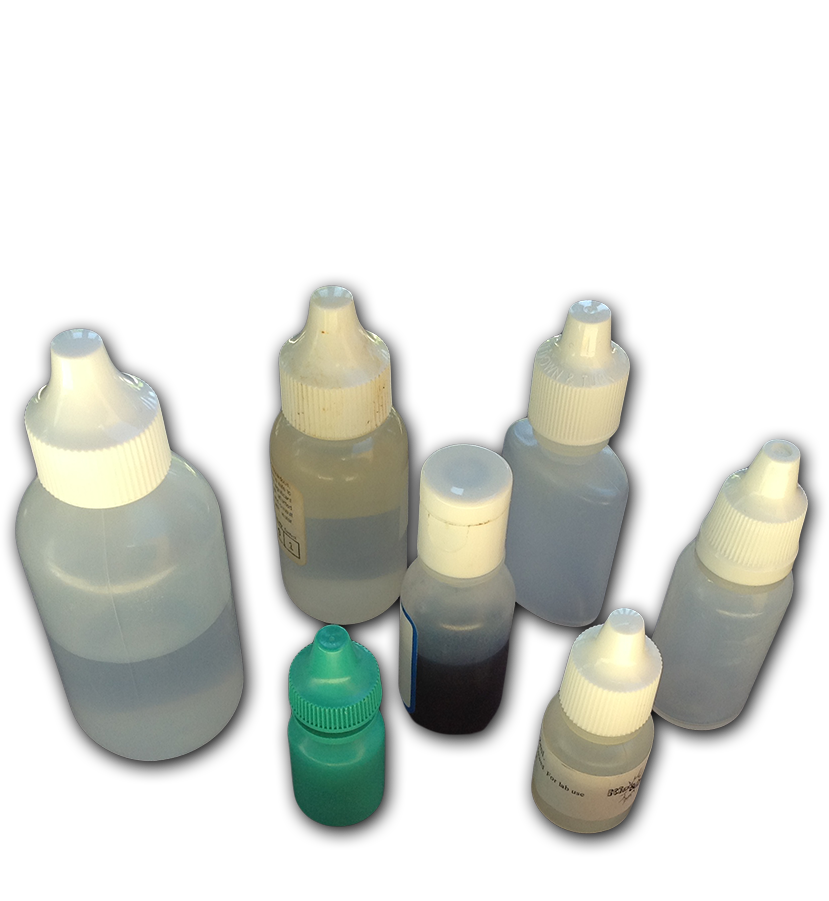
Vinegar
Dropper bottles are a good choice for administering vinegar. Closed bottles contain vinegar’s pungent aroma, and allow good control. White/distilled vinegar is the best choice because it has no color.
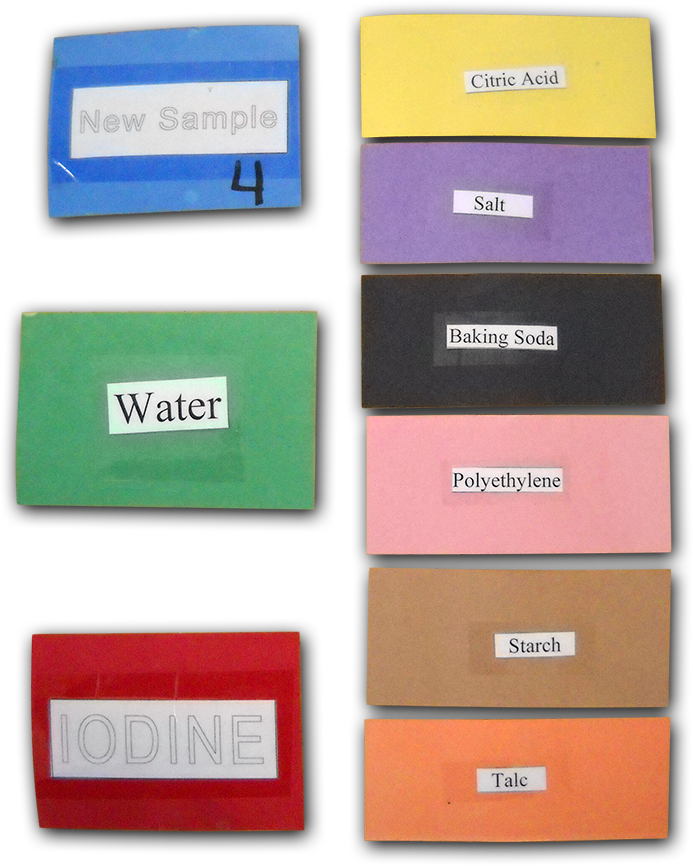
Chemical Cards
Giving teams cards, one for each of the known powders, is an easy way for students to keep track of which powders they have yet to test. Laminating cards with clear packing tape enables them to survive spills and extends useful life. Color coding the cards makes for easy sorting after the activity.
Powder Samples
The selected powders can all be easily (and inexpensively) obtained:
Salt, baking soda, and (corn) starch can be found at any grocery store.
Citric acid can be found in the Middle Eastern condiments and spices section of a grocery store with ethnic/international offerings.
Plaster of Paris can be purchased at any hardware or craft store.
Talc is available in the health and beauty section of a drug or department store.
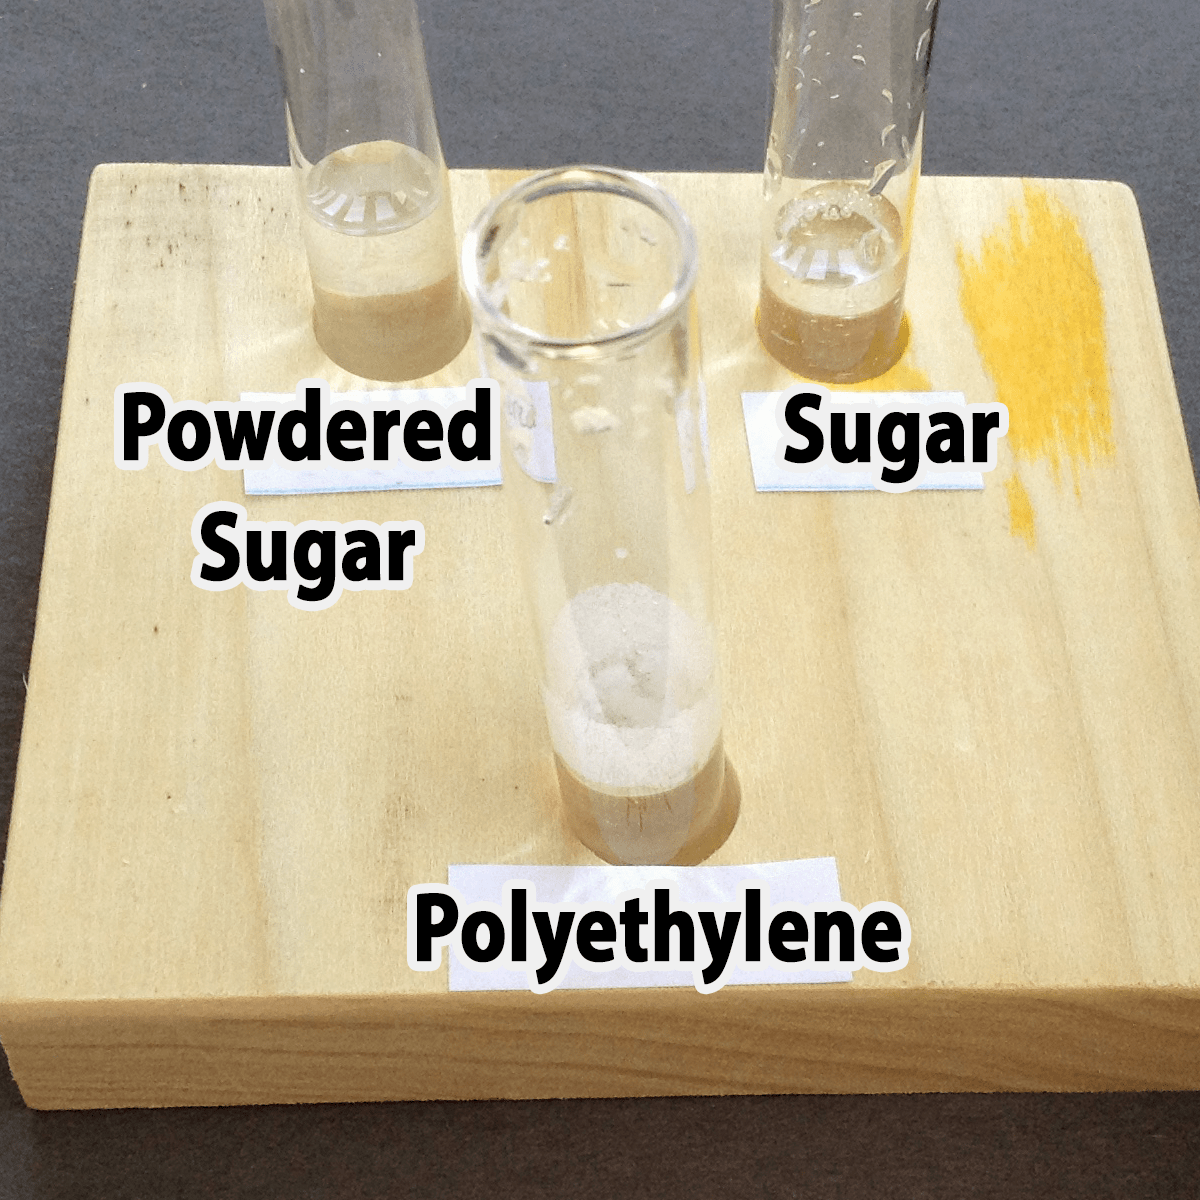
Alternative Powders
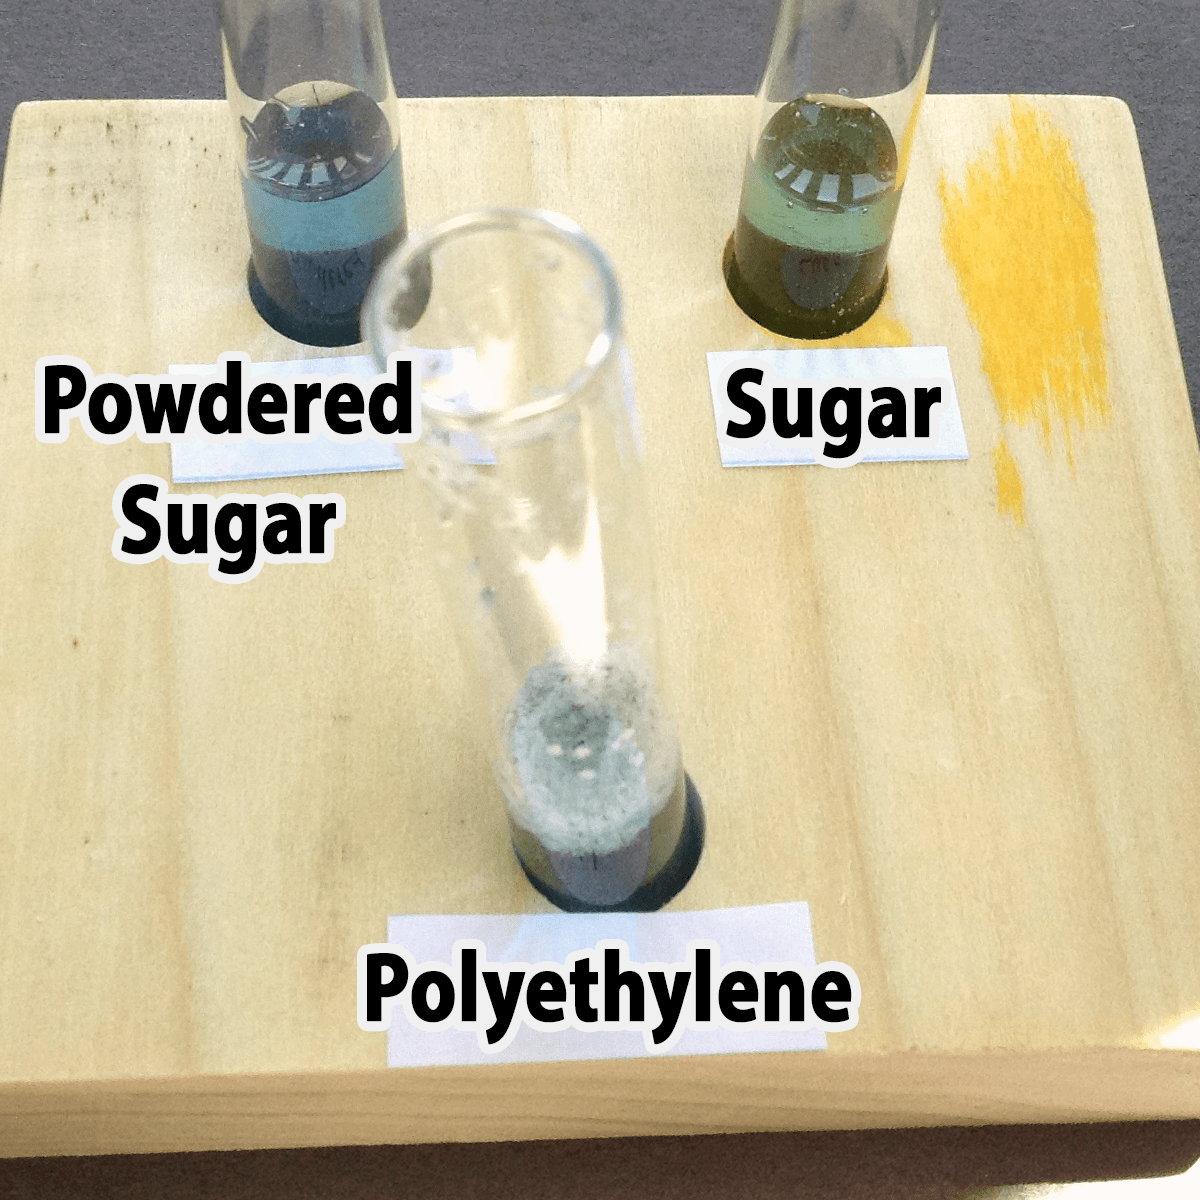
Polyethylene powder used for rotational molding is an interesting alternative. You might be able to find it as a high school industrial technology class, or a company that does rotational molding. You might also be able to find very fine, white sand, although you’ll not want to pour used samples with sand down the drain. Both polyethylene (a plastic) and sand are inert (will not chemically react with) and won’t dissolve in water. The sand sinks; the polyethylene floats.
Granulated sugar is another alternative. You would need to provide a hand lens for each pair of students, however, because granulated sugar and salt are really only distinguished by crystal shape (you do not want the students to taste the powders). It would not be possible to distinguish salt from sugar in mixtures with the other powders. Confectioners (powdered) sugar resembles plaster of Paris, starch, and talc in appearance, but unlike these it will dissolve in water. Both types of sugar are readily available at any grocery store.
Printables
The link below contains .pdf files for the various handouts used in this activity:
Preparation
For the sake of time and cleanliness, the samples should be prepared before the activity begins. Prepare one tube of each of the six known powders for each of the pairs of students. An amount of powder approximately half the size of a pea is adequate. At least three mystery mixtures per student pair should also be readied. Choose mixtures that will give students a reasonable chance of success. Combinations might include:
- Citric acid + baking soda
- Citric acid + starch
- Citric acid + salt
- Baking soda + starch
- Baking soda + salt
- Baking soda + talc
- Starch + talc
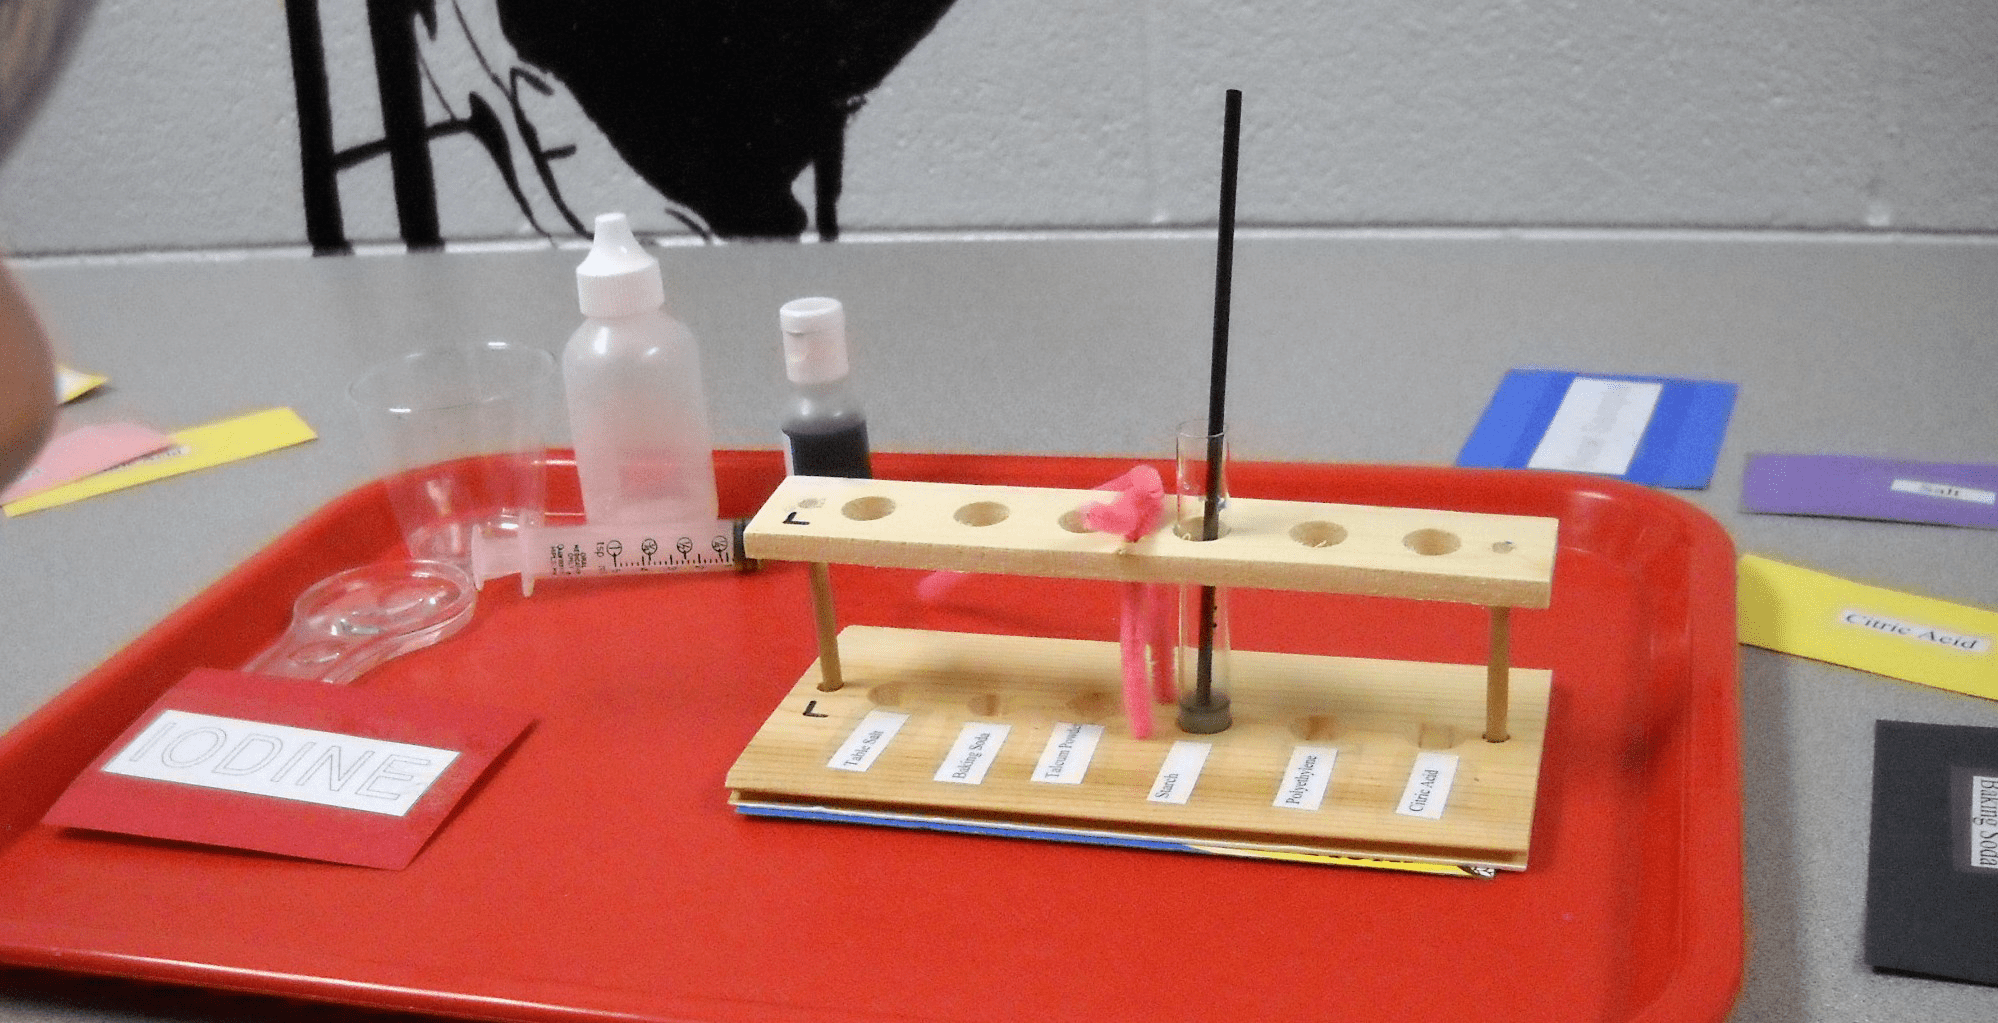
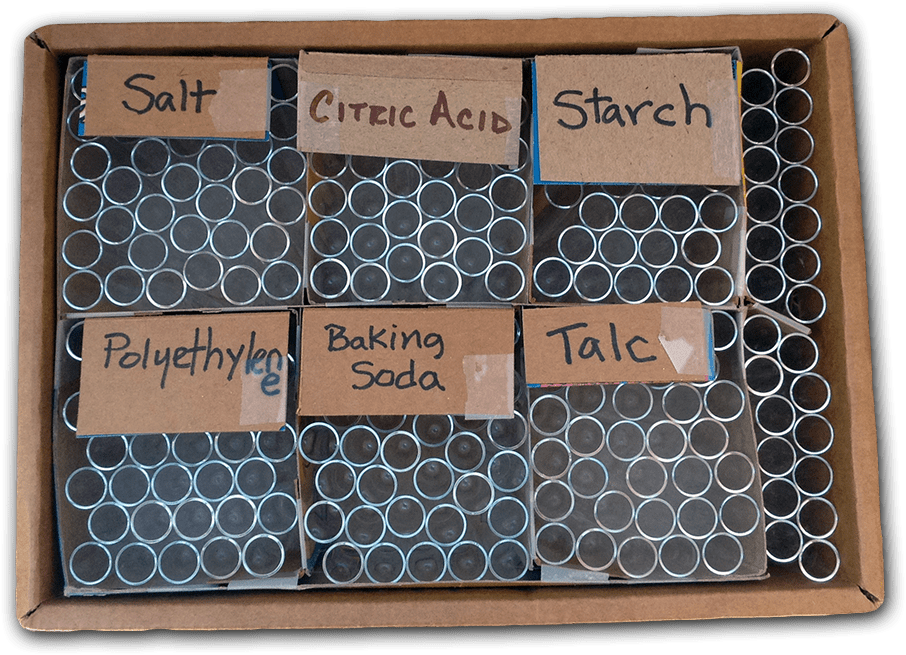
Preparing samples in tubes:
Get a small box(es), preferably about the same height or slightly shorter than the height of the tubes. Cut pieces of stiff cardboard to divide the box(es) into sections, Label one section for each known powder. As you add powder to tubes, place the tubes upright into the appropriate section, as shown in the photo to the right. Use crumpled paper to keep the tubes upright.
Assign each mystery mixture a number. Prepare a section in your box(es) for each mixture. Prepare enough mixture samples so that each team will have at least three different ones to text.
The easiest way to quickly extract tubes from the box, especially if the tubes are packed tightly together, is to insert the eraser end of a pencil into the top of the tube to lift it.
Running the Module
Samples have already been measured out into small glass test tubes. To minimize the change of breakage, the students won’t be leaving their stations. The helpers will bring untested samples and remove completed ones so that students have no more than one tube at a time.

The students will run tests to determine the properties of the six known white powders. They will then get up to five mixtures of two powders to investigate.
Give each pair of students the following:
- A test tube holder
- A syringe or calibrated eyedropper
- A cup of water
- Dropper bottle of bromothymol blue
- Dropper bottle of vinegar
- 10x Stirring sticks
- An instruction card
- A record sheet
- A pencil
- A card for each of the following: iodine, new sample, water, starch, plaster of Paris, salt, talc, baking soda, and citric acid.
The steps the pairs of students will follow for each sample (known and mystery powders) are shown below:
Instruction Card
Step 1. Look at your sample. Is it a white powder, or sparkly crystals?
Step 2. Add 2 mL of water to the tube. Did it fizz?
Stir it gently. Did the powder disappear (dissolve)? Did it sink? Did it float?
Step 3. Add one drop of bromothymol blue. Did the solution in your tube turn yellow (acidic), green (neutral), or blue (basic)?
Step 4. IF bromothymol blue turned your sample BLUE, slowly add vinegar one drop at a time until the solution turns yellow.
Did the solution fizz or form bubbles?
Step 5. Hold up your “Iodine” card. A helper will add one drop of iodine solution. What is the color of your solution now?
Step 6. Hold up your “New Sample” card. Give the runner the tag for the next sample you want.
Experiment Walk-through
The first samples the students will examine are the six known powders. By determining how each powder reacts to the various tests, the students will build an answer key by recording the results on their record sheets, which they will then reference to sleuth out which two powders comprise each of their mystery samples. Photos of how the various powder samples should react to a test are included with each step. A table of all the results are included at the end of this walk-through.
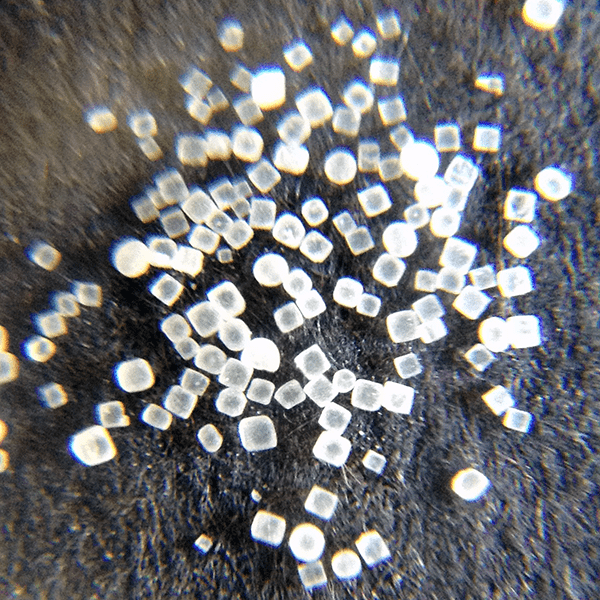
Step 1. Look at your sample. Is it a white powder, or sparkly crystals?
This can be done by eye, but if you have simple hand lenses (e.g., a magnifying glass) they will enable students to see even more detail about the powder grains.
White powder
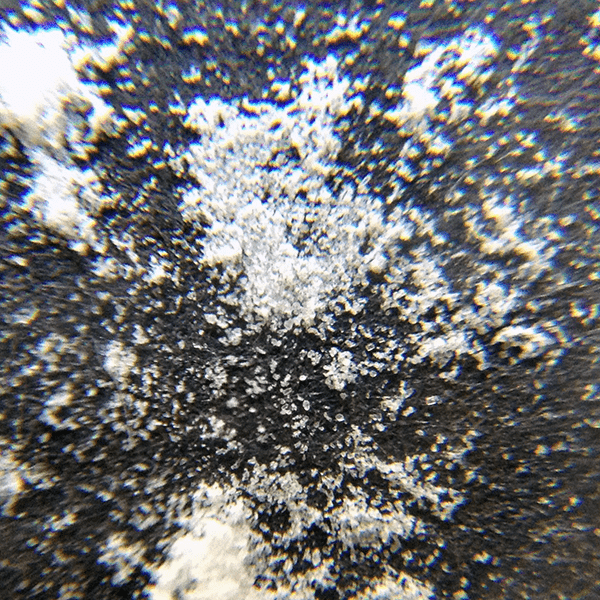
Sparkly crystals
Step 2. Add 2 mL of water to the tube. Did it fizz? Stir it gently. Did the powder disappear (dissolve)? Did it sink? Did it float?

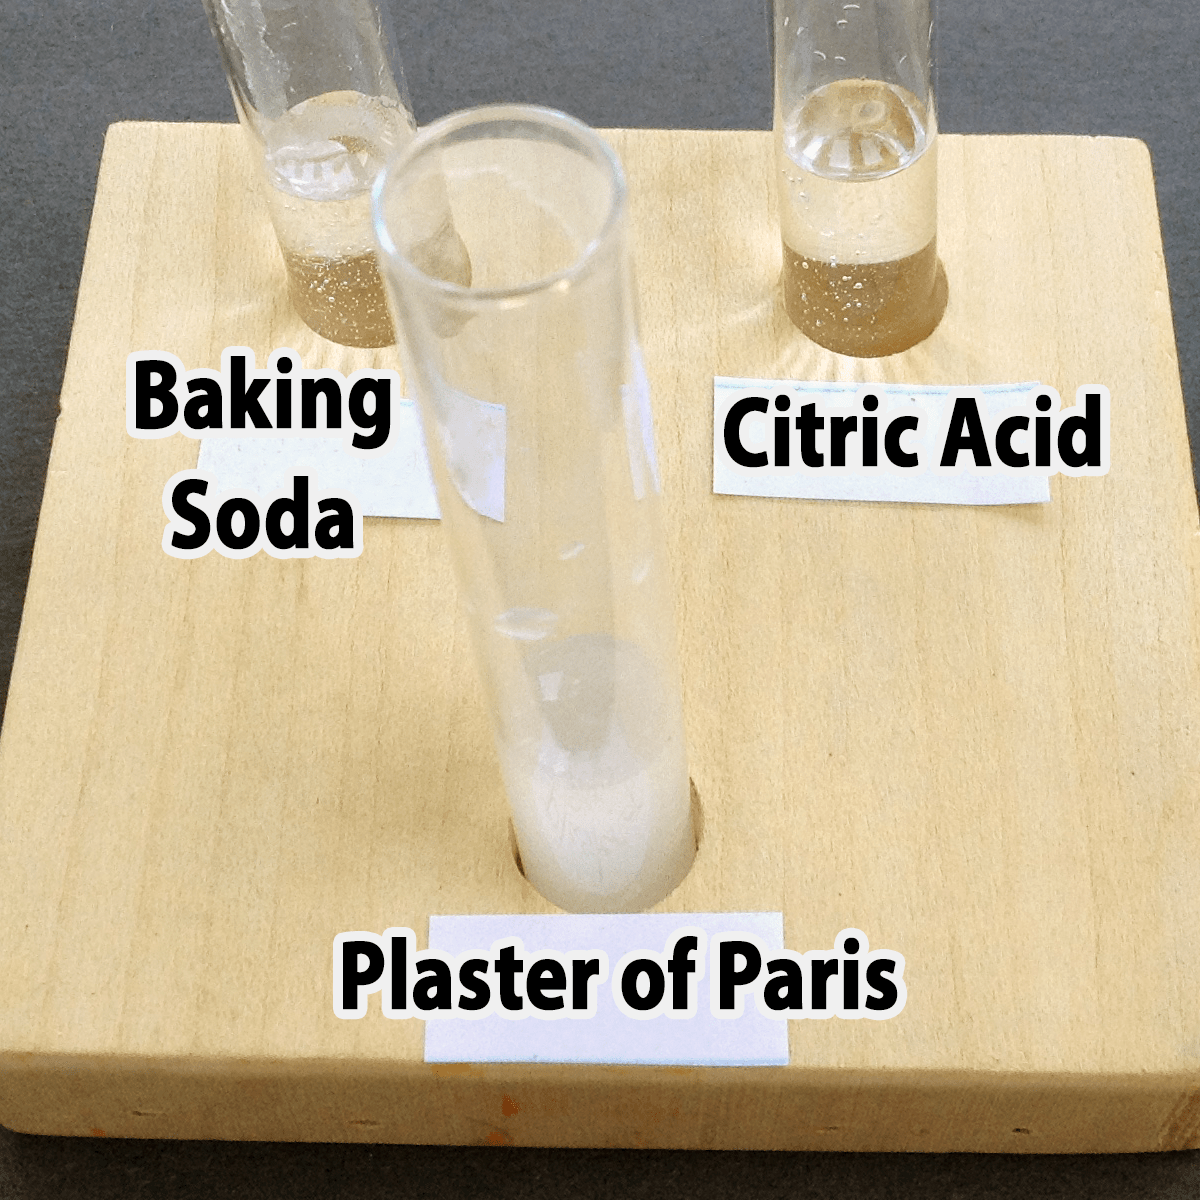
The students may be puzzled to find that none of the individual powers fizz/bubble when water is introduced? Why, then, did we even bother to ask that question?
Substances that contain carbonate ions react with acid in water to form carbon dioxide gas. The chemical name of baking soda is sodium bicarbonate. Bubbles of carbon dioxide gas are released when baking soda is mixed with an acid in water.

And so, although none of the individual powders will fizz in water, a mystery mixture of baking soda and citric acid will.
Step 3. Add one drop of bromothymol blue. Did the solution in your tube turn yellow (acidic), green (neutral), or blue (basic)?
The solution should change color immediately once the bromothymol blue is added.

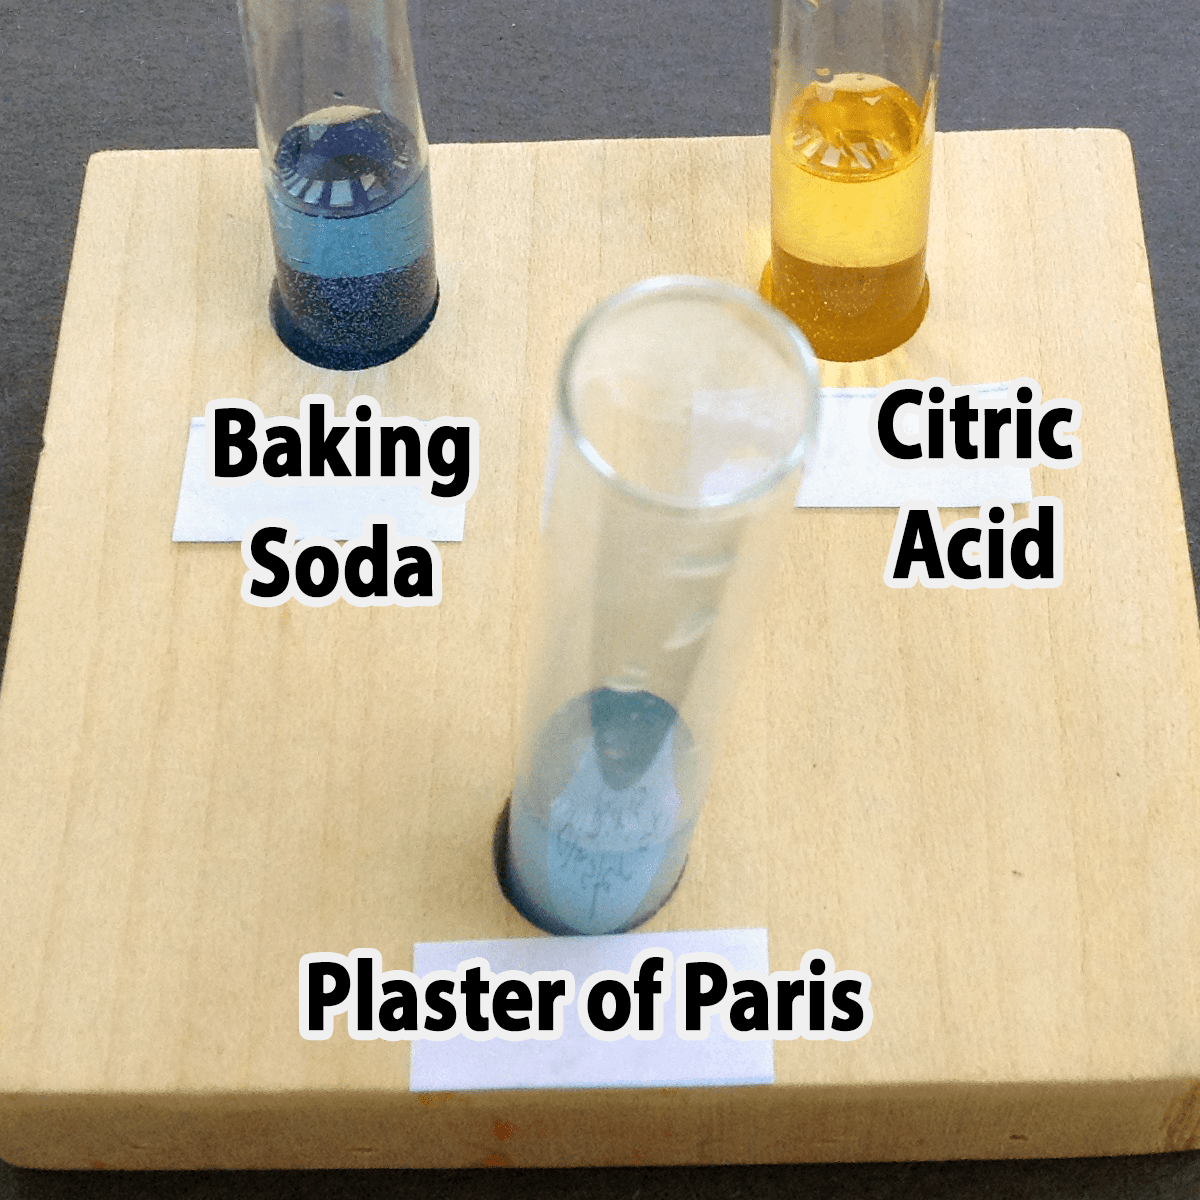
pH (which stands for “potential of hydrogen” or “power of hydrogen”) is used to denote how acidic or basic an aqueous (“in water”) solution is. A pH of 7 is neutral, such as pure, distilled water: neither acidic nor basic. (Note, though, that minerals and such present in your water can turn it acidic or basic). The lower the pH of a solution (<7) the more acidic it is, and the higher the pH (>7) the more basic or alkaline it is. Strong acids will have low numbers, and strong bases will have high numbers. Some familiar examples and their pH are shown on the scale below:

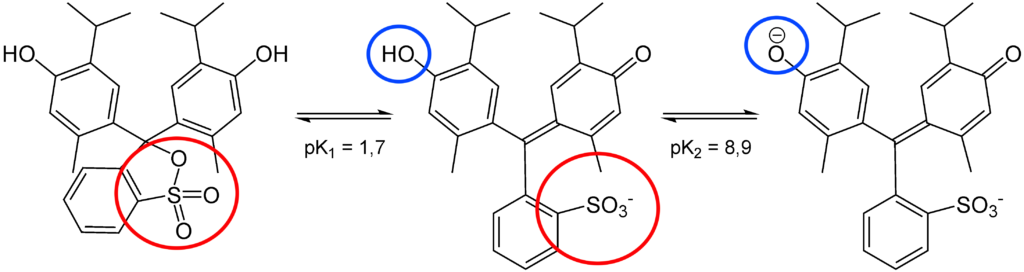
Acid-base indicators are molecules whose color depends on the pH. Bromothymol (sometimes labeled “bromthymol”) blue is yellow in acids, green at pH seven (neutral) and blue in bases.

The colors change because the molecule itself rearranges itself under different pH conditions.
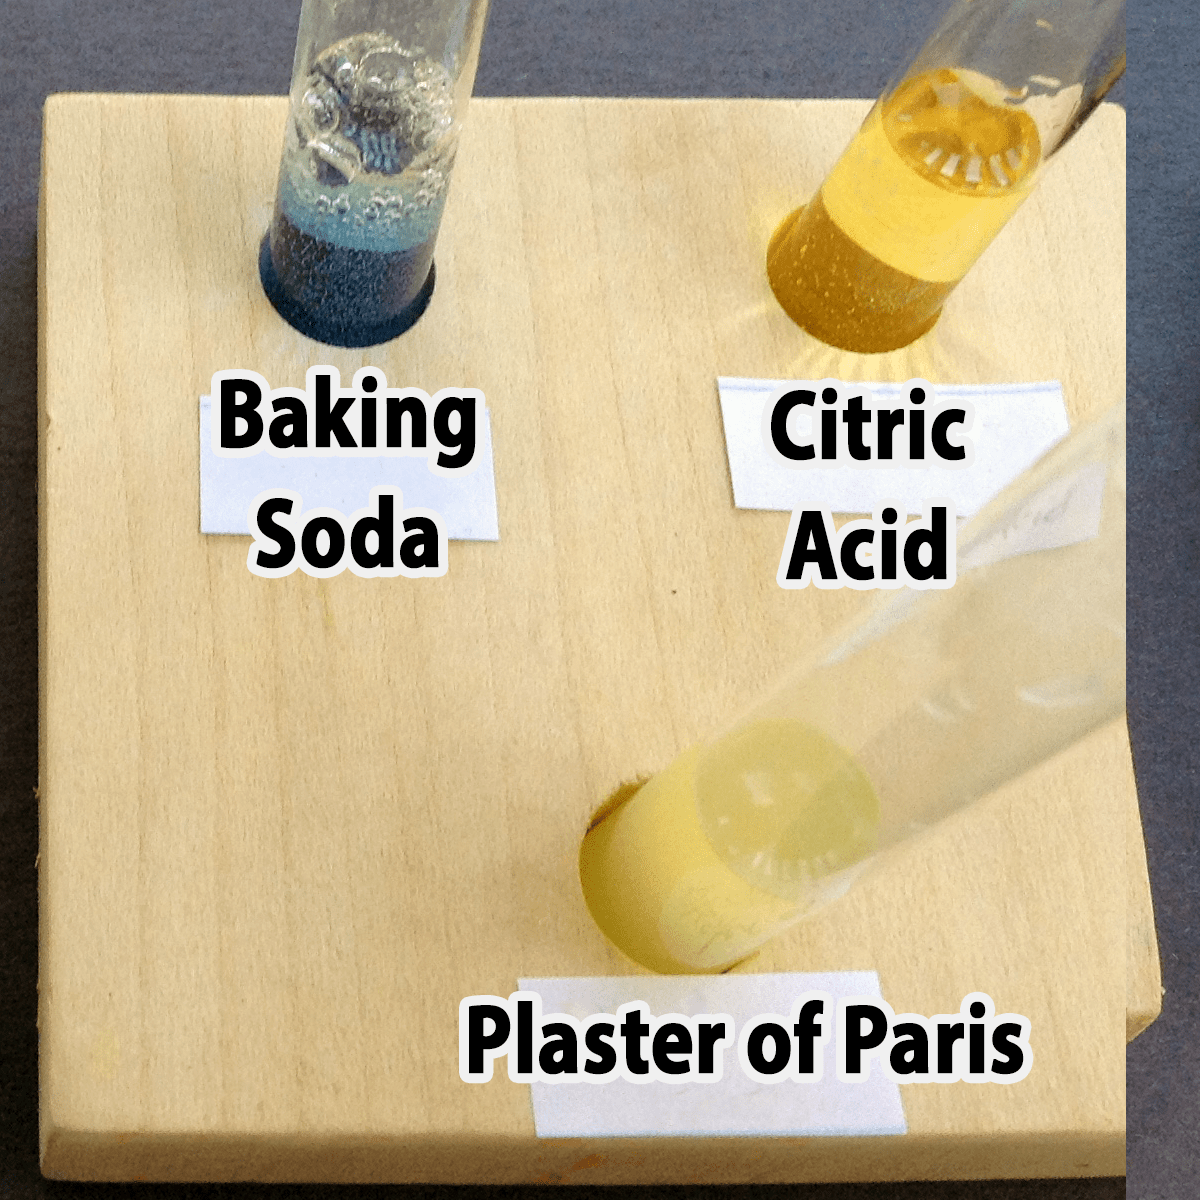
Step 4. IF bromothymol blue turned your sample BLUE, slowly add vinegar one drop at a time until the solution turns yellow. Did the solution fizz or form bubbles?


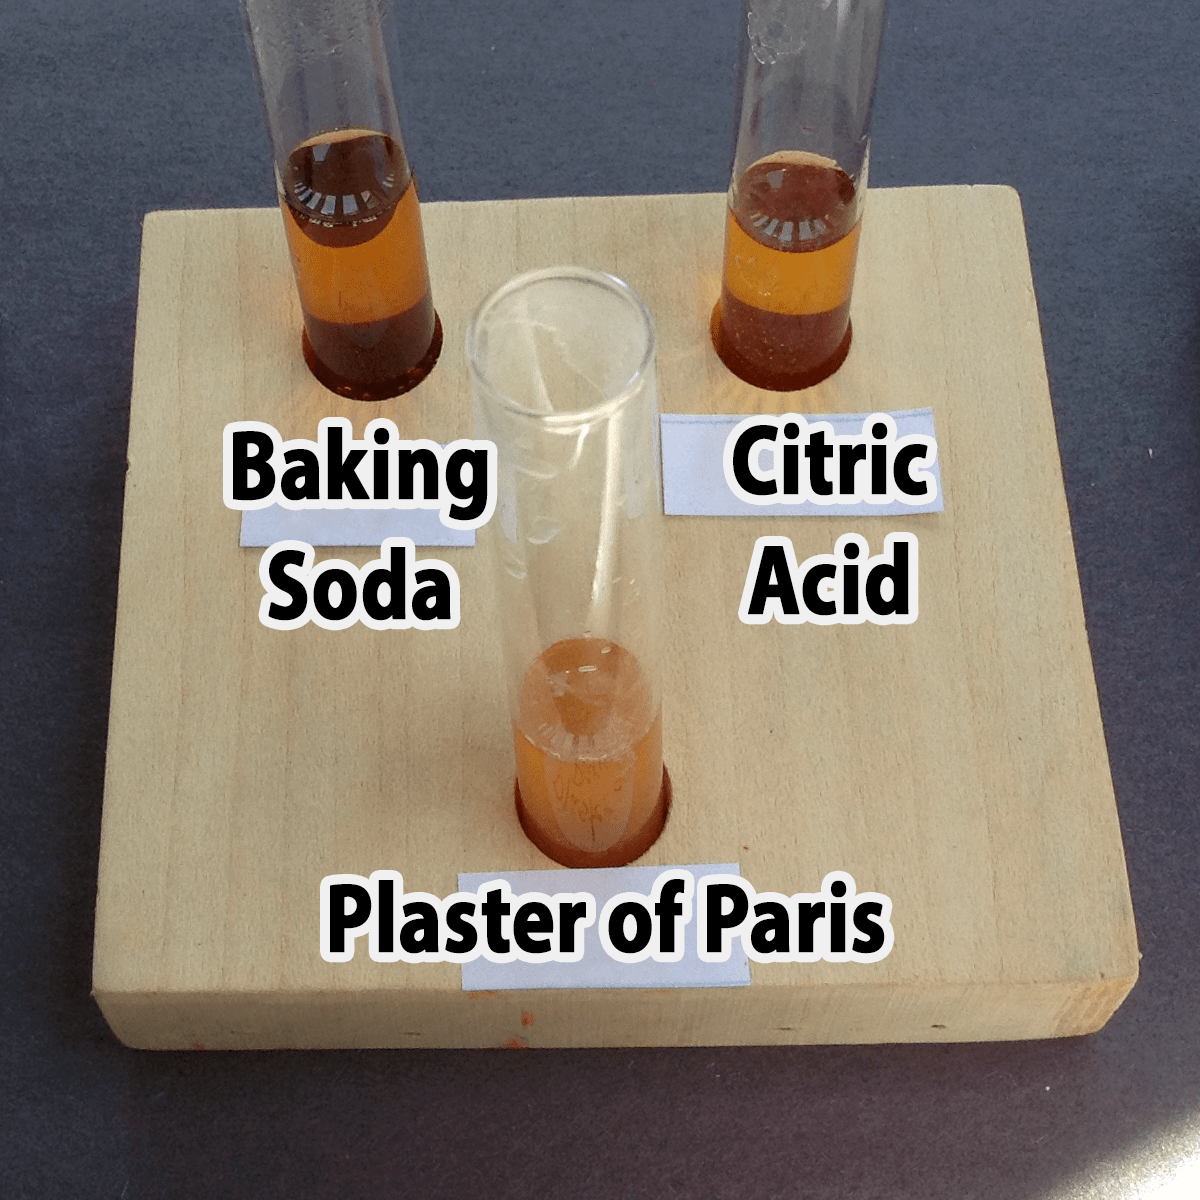
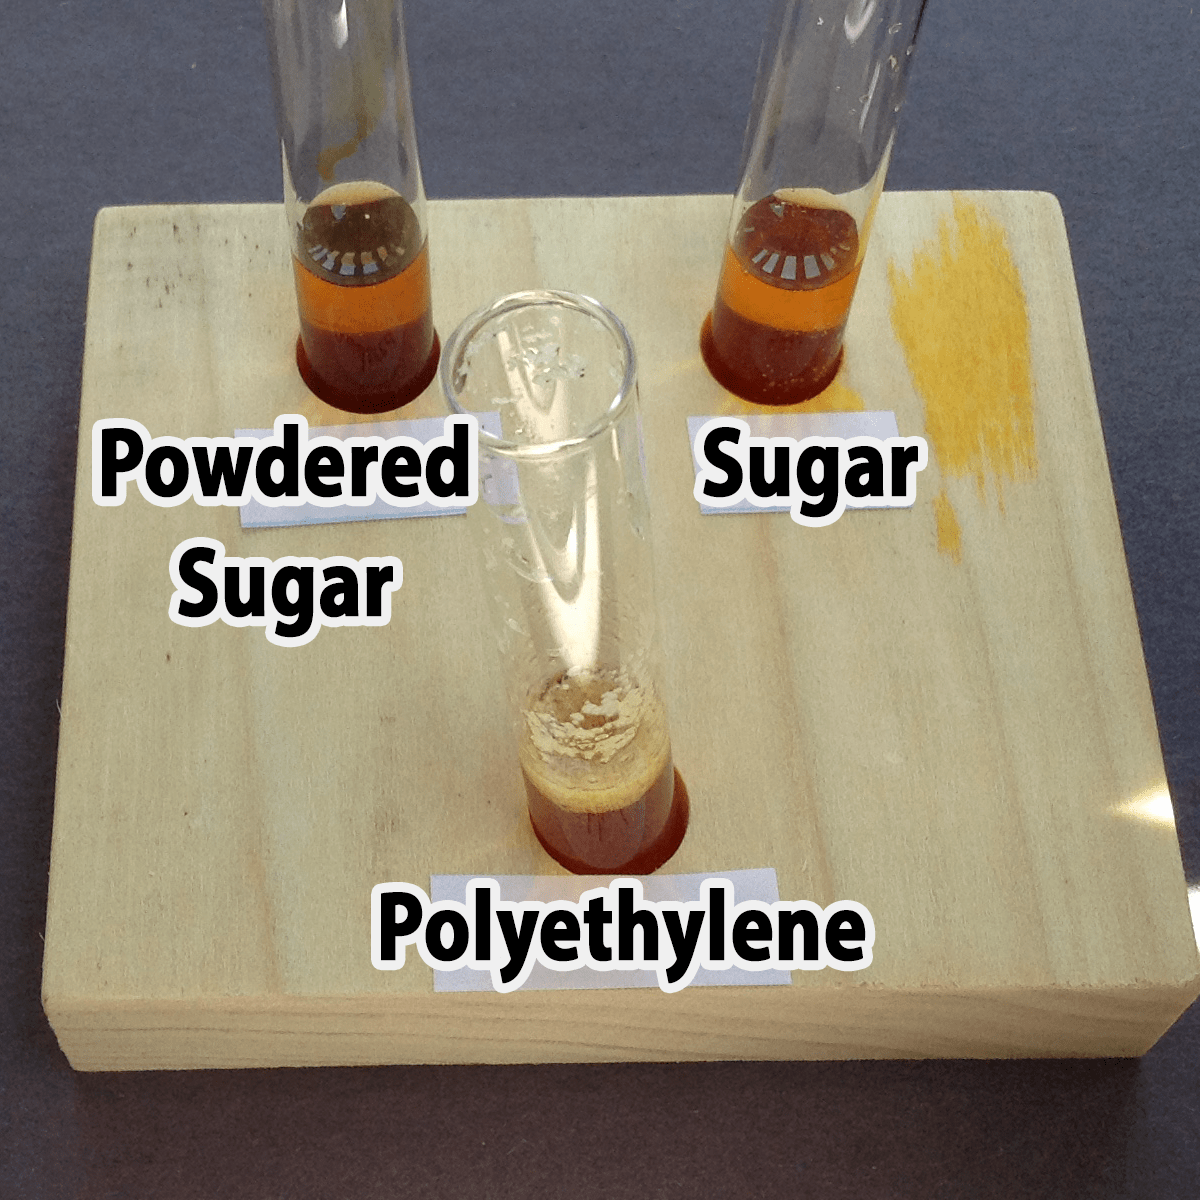
Step 5. Hold up your “Iodine” card. A helper will add one drop of iodine solution. What is the color of your solution now?
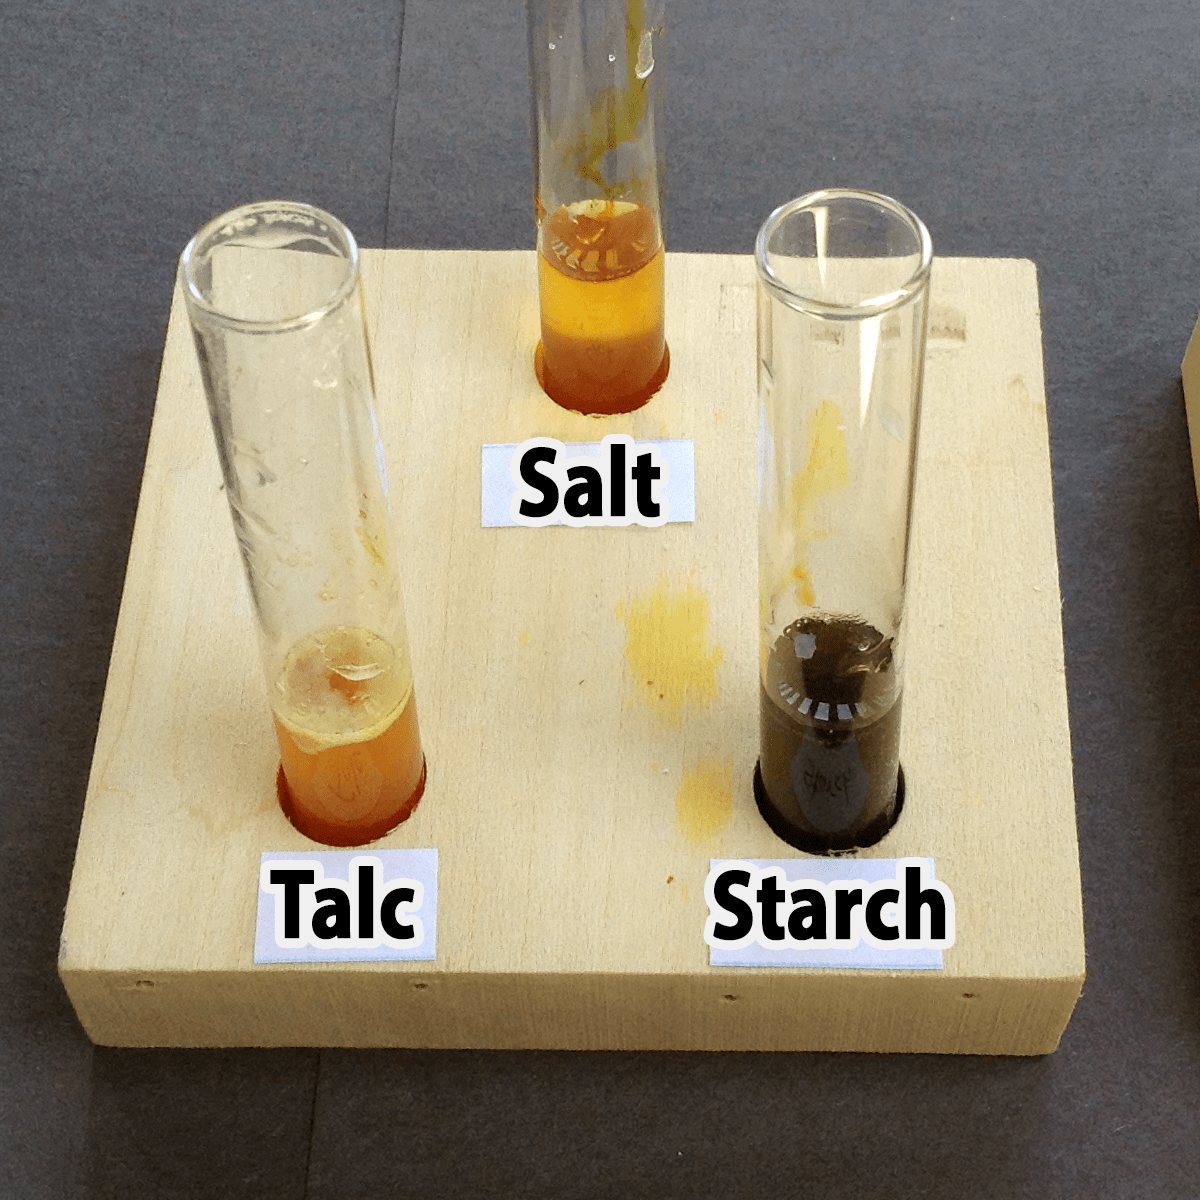
Starch molecules are very large, and form long coils. Iodine and starch form a highly colored blue-black complex. Scientists still don’t know exactly how this happens, but it appears that the large iodine atoms get stuck in the coils of the starch.

Test Results
| Compound | Step 1 Appearance | Step 2a Add water: bubbles?*** | Step 2b Water solubility | Step 3 Bromothymol blue | Step 4 Vinegar (if step 3 is blue) | Step 5 Iodine |
|---|---|---|---|---|---|---|
| Table Salt | crystals (cubes) | no | dissolves | green* | yellow after 1 drop | reddish |
| Baking Soda | powder | no | dissolves | blue | fizzes | reddish |
| Talc | powder | no | does not dissolve / suspension | green* | yellow after 1 drop | reddish** |
| Starch | powder | no | does not dissolve / suspension | green* | yellow after 1 drop | blackish |
| Plaster of Paris | powder | no | does not dissolve / suspension | green* | yellow after 1 drop | reddish |
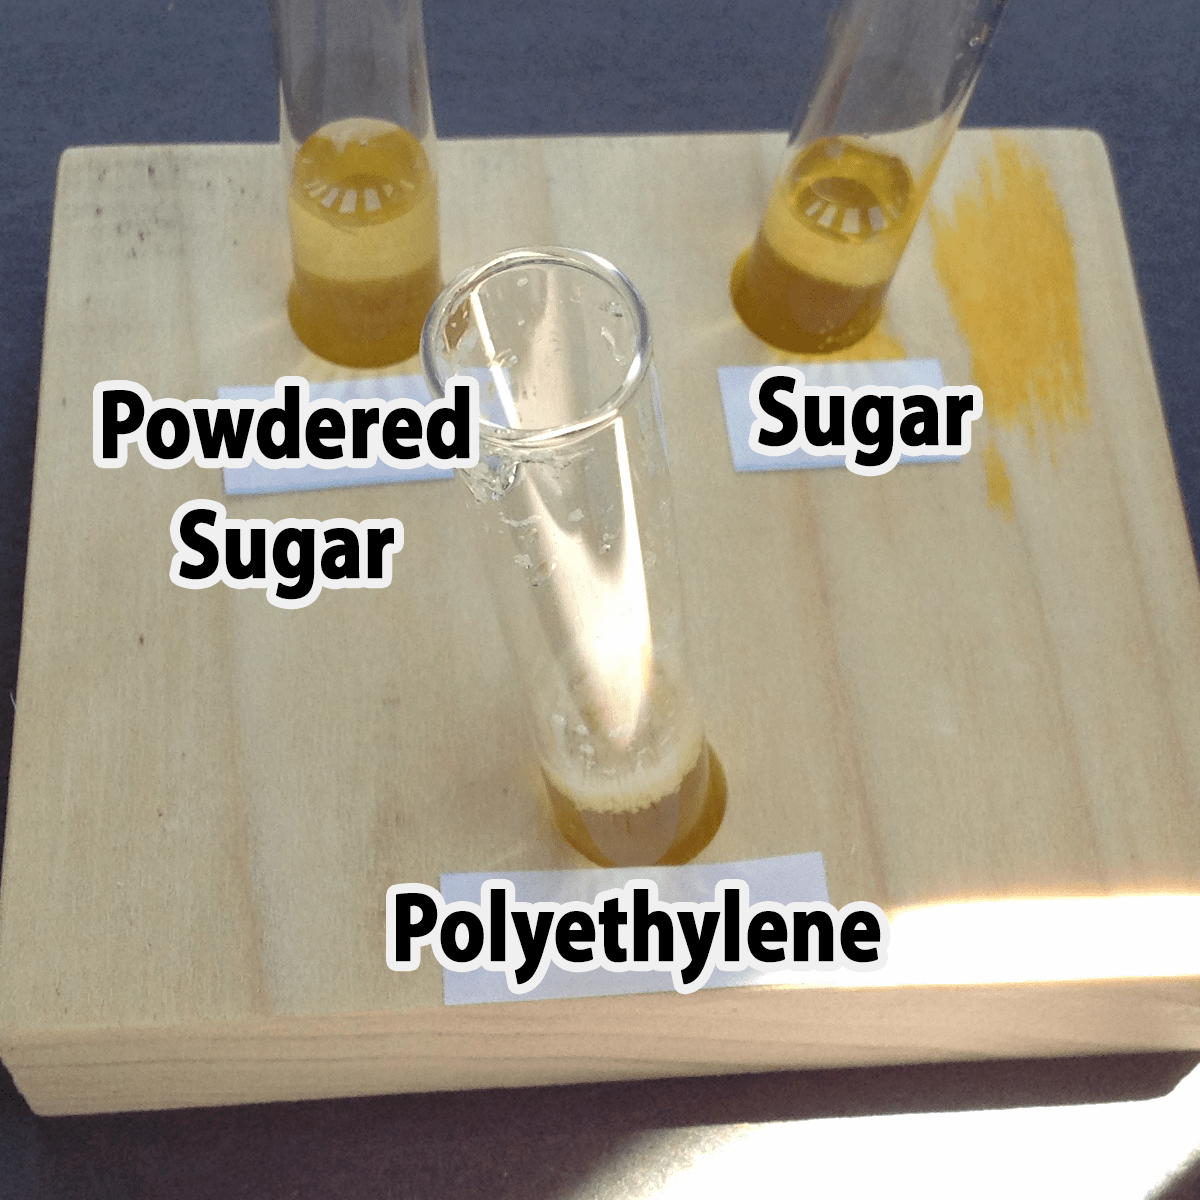
| Citric Acid | crystals | no | dissolves | yellow | n/a | reddish |
| Polyethylene Powder | powder | no | does not dissolve / floats | green* | yellow after 1 drop | reddish |
| White Sand | crystals | no | does not dissolve / sinks | green* | yellow after 1 drop | reddish |
| Granulated Sugar | crystals | no | dissolves | green* | yellow after 1 drop | reddish |
| Confectioner’s Sugar | powder | no | dissolves | green* | yellow after 1 drop | reddish** |
** Some talc based powders and some confectioners sugar may have added starch to prevent caking. There shouldn’t be enough to produce a reaction with iodine, but check ahead of your activity to make sure.
*** Only a mixture of baking soda and citric acid will fizz when water is added. This is the basis for tablets , like denture cleaners, that fizz in water.
Clean Up and Storage
Provide a pail for used samples. Volunteers should collect finished tubes when the children request new samples and immediately place those finished tubes in the pail. Don’t worry about the contents spilling out and mixing together. After the activity put the pail in the sink and flush it with water until colored contents are nearly gone. Then rinse the tubes individually to make sure they’re clean. If you are using sand, provide a separate container for those tubes since you do not want to flush sand down the drain.


0 Comments