In this module, each student represents a carbon atom. The purpose of the activity is to show how carbon atoms move through the environment over time, known as the “carbon cycle”.
*This activity is well-suited for student volunteers. Place your most capable volunteers at the busiest stations, especially Plants, Oceans, and Atmosphere.
Supplies Needed
Reusable
- 18x Bowls
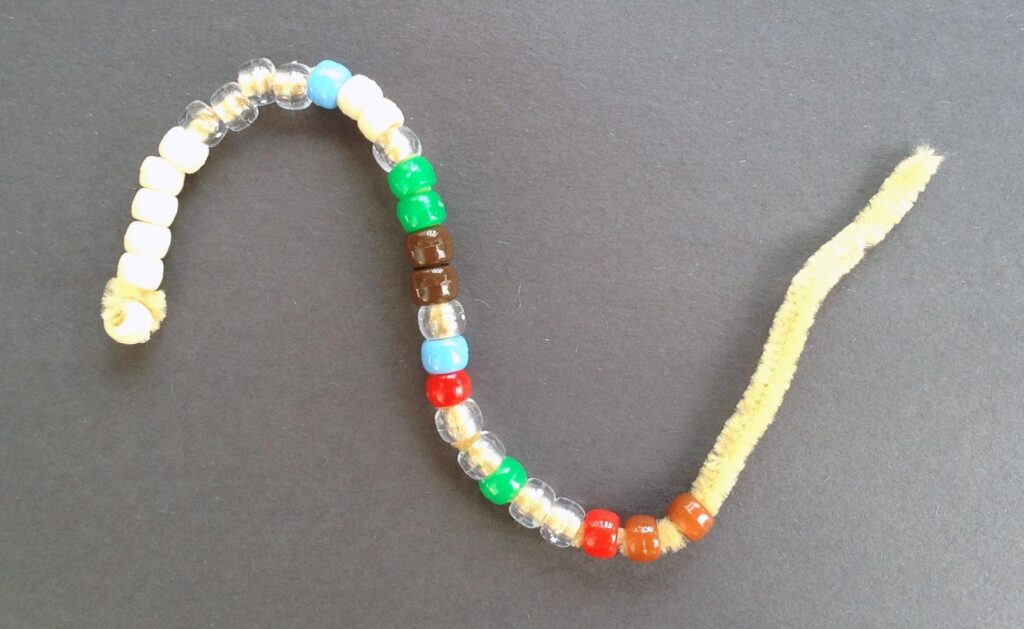
- 1x 12″ (30 cm) chenille stem (“pipe cleaner”) per student, any color
- Plastic pony beads (see below)
- Loud bell, whistle, or other audible signal
- 9x Sheet protectors (optional)
Consumable
- Masking tape (or similar)
Printable
- Station signs
- Carbon Cycle game cards

The quantity of pony beads needed depends on the number of students and how many rounds you choose to do. The number of rounds will depend on the age of students and amount of time you have, of course. As an example, the most recent running with elementary students lasted ~28 rounds. You will need more of the colors used for Atmosphere, Oceans, and Plants than the others. Purchasing mixed bags usually saves money. Some colors, like black, you’ll probably need to purchase separately.
One suggestion for bead color assignments is:
- Atmosphere (Colorless)
- Oceans (Blue)
- Soil (Brown)
- Plants (Green)
- Animals (Red)
- Plastics (Pink or Purple)
- Coal (Black)
- Petroleum (Yellow)
- Limestone (White or Cream)
Printables
Printable versions of the game cards and station signs can be downloaded using the button below. If the activity is being run for particularly young children, a version of the game cards without the text descriptions has been included.
Preparation
Pre-Activity Preparation
Print the game cards on cardstock and cut them apart. If you do not use different colors of card stock for each station mark each card with a dot of color. This will greatly aid sorting them should they get mixed together. If desired, put strips of clear packing tape, one over the text of each column of cards, before cutting them apart to extend the life of the cards. (Or laminate them, if you have that capability.)

Sort the beads by color into bowls. Determine which color will correspond to each station
Attach one bead to each chenille stem, to keep subsequently added beads from sliding off. Evenly distribute the colors of these initial beads among the nine stations. (Ideally, stem color will also match the initial bead color, but this is not necessary.)
Print the station signs if desired, and put them into sheet protectors. Alternatively, simply print the names of each station on sheets of paper. You could use colored paper, colored print, or markers, that corresponds to color of that station’s beads.

Activity Day Set-Up
There are nine stations, each represented by a 8.5″ x 11″ picture in a sheet protector. Tape these to the walls in a gym or large, open room, putting as much distance as possible between them. If there are fewer volunteers than stations you will have to place some stations close to one another so that a single person can supervise them. The best stations to pair are Limestone, Soil, Oil, and Coal.
Place two bowls at each station, including those that may be paired with another. Each station needs its own bowls. In one bowl place the cards for that station face down. In the other bowl place the pony beads for that station.
Running the Module
Introduction
Give a very brief ( less than five minutes) explanation of the carbon cycle. You might show a diagram of the cycle, or perhaps play a very brief video. The National Oceanic and Atmospheric Administration (NOAA) has an excellent, less than two minute-long video (HERE) that introduces the carbon cycle.
Note that most resources will not include the industrial use of limestone and plastics. (We do!) Consideration of these could wait until the discussion at the end of the activity.
Play
Explain the rules, then give each student a chenille stem with one bead attached. The students report to the station that corresponds to that bead. When the game leader sounds a whistle or other audible signal, each student chooses a card at that station, reads it, then returns it FACE DOWN to the bowl. The students either move to a new station or remain as directed by the card.

- The volunteer at each station gives each student (including those who didn’t change stations), one bead from the station. The students add the new bead to their chenille stem.
- When the game leader sounds the signal again, each student choose a card at their current station, reads it, then returns it FACE DOWN to the bowl.
- The students either move to a new station or remain as directed by the card.
Repeat these three steps for ten or more rounds as time allows or you run out of one or more colors of bead. The more rounds the more interesting the discussion at the end. After students and volunteers learn the process and where stations are located the leader can often significantly shorten the time between rounds. However, do allow time for students to read the explanations on the cards. Volunteers may need to encourage students to read the cards before returning them to the bowl.
Alternatively, particularly for many (25+) children in a large gym, you might use two signals, the first to choose and read the card, followed shortly by a second to move.
Discussion
At the end, gather all of the students together to examine and compare their individual collections of beads. At what stations did students tend to linger longer? Why? From which stations did students tend to leave quickly? Why?
The relative ratios of cards don’t quantitatively represent the amount of carbon in any one location, and don’t consider events such as volcanic eruptions. However, they will give the children a sense of sources of atmospheric carbon dioxide, and the nature of carbon sinks, entities that trap and hold carbon for long periods.
There are countless excellent discussions of the carbon cycle online. You might consider this one, from NASA (HERE), to help you prepare to guide the discussion and answer questions.
Did you run your little carbons through the cycle? Come up with any new twists to the game? Let us know!


0 Comments