This two-part activity introduces children to basic bridge types and design considerations. Students then put this knowledge into practice, designing and building model bridges (to be strong-but-light) and towers (to be the tallest).
*You want enough helpers on hand to prevent long waits at the store on Day 1, or testing bridges on Day 2. Younger students may need help reading and understanding the instructions.
Supplies
Demonstration (Day 1)
Reusable:
- 2× Clamps or clips
- 2+ Quarters
- Blocks or books, enough to make two stacks 2-3″ high
- Scissors
- Pictures and/or drawings of assorted modern and historic bridges, including beam, suspension, arch, truss, tiered arch, and cable stay. Be sure to have at least one good image of a truss bridge, and one of the Eiffel tower.
Consumable:
- 9″×12″ sheet of construction or similar weight paper
- Tape (masking or cellophane)
Bridge Building (Day 1)
Reusable:
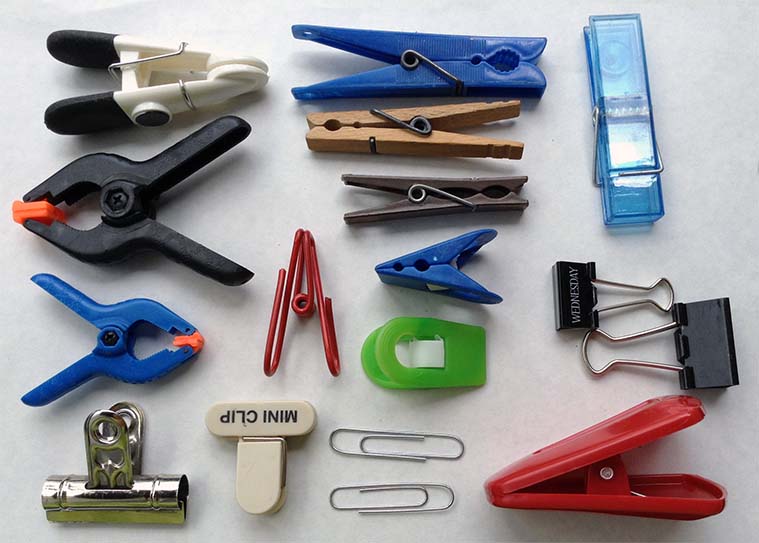
- Assorted small clamps and clips of any type, including large paper clips
- Assorted rubber bands
- 1× Pencil per pair of students, plus a few extra
- 1× Foot-long ruler per pair of students, plus a few for the store
- 1× Scissors per pair of students, plus a few for the store
- 1× Cafeteria tray per pair of students (optional)
- 1 or more die cast toy cards or trucks, such as Hot Wheels or Matchbox
Consumable:
- Masking tape
- Chipboard (cereal boxes, etc.) …DO NOT substitute corrugated cardboard. It is too strong!
- Construction or similar weight paper
- Light string or yarn
- 1× bottle of white (school) glue per pair of students (if possible)
- Newspaper
Printable:
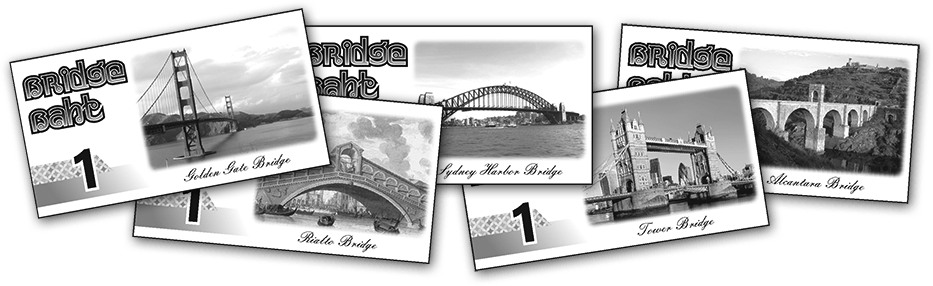
- Bridge Baht (the store’s “money”)
Tower Building and Bridge Testing (Day 2)
- Hanger and pail just large enough to hold all of your weights
- Weights for testing, 1000-1500 grams in total should be more than adequate (see Toolbox)
- Electronic balance
- Calculator (Optional)
- Meter stick and/or metric tape measure
- Building set pieces: Version 1 or 2 (see below)
- 1× Ruler per pair of students
- 1× Pencil per pair of students, plus a few extra
- 1× Small plastic cup, 2-3″ high
- 1× Cafeteria tray per pair of students (optional)
Version 1:
- Commercial or homemade building sets (such as discussed in this Toolbox post)
- 1× Plastic bag per pair of students
Version 2:
- Pieces of cardboard, chipboard, or heavy paper thin enough to be cut safely with your scissors
- Masking Tape
- 1× Scissors per pair of students
Printables
The play money (Bridge Baht) and various record sheets used in this module can be downloaded using the button below.
Day 1
Preparation
Demonstration:
Cut the paper crosswise into three 3 inch wide pieces, and two 1 ½ inch wide pieces. Form and tape one 3 inch piece lengthwise into a tube. Fold one 3 inch wide piece into an lengthwise accordion with each pleat ¼ inch wide. Fold the 1 ½ inch wide pieces into thirds lengthwise to form three-layer, ½ inch wide strips. Mark one into thirds crosswise. Crease and fold to form a triangle. Join, but do not overlap, the loose ends and secure with tape. Mark the other strip into quarters. Crease and fold to form a square. Join, but do not overlap, the loose ends and secure with tape. Place two quarters side-by-side about 1/8 inch apart. Place one piece of tape across the gap to join the quarters. Flip it over and attach a second piece of tape in the same manner.
Locate and print images, or prepare a slide show, of bridge and Eiffel Tower pictures. Wikipedia is a good place to start.
Building:
Assemble the materials for the store. Chipboard pieces should be roughly 9″×12″. If smaller, sell two pieces per Bridge Baht (the store’s “money”), but make sure at least one dimension is ten inches or longer.
Print and cut the Bridge Baht, enough for ten baht per pair of students.
Assign a number to each record sheet. Prepare a tray or station for each pair of students with pencils, a ruler, scissors, bottle of white school glue, bridge challenge sheet, bridge and tower record sheet, and ten Bridge Baht. If you do not have enough glue bottles, arrange your stations to allow easy sharing.
Put newspaper down at each station or (if using trays) line each tray with newspaper to protect it from drips of glue.
Introduction
Your challenges for today and (tomorrow/next week/next session) will be to design and build bridges and towers. Before you start, I want to give you some clues to help you make a successful structure.
Two forces that engineers must consider when designing bridges or towers are tension and torsion. An object in tension is being pulled in opposite directions along an axis. A familiar example is the game tug of war, where two teams are pulling on the same rope, both applying a force but in opposite directions. A torsional force is where the two ends of the object are being rotated oppositely. This is easily demonstrated by twisting a foam pool noodle’s ends in opposite directions (one end towards you, one away from you) causing it to spiral like a drill-bit. Engineers both ancient and modern developed a variety of bridge types that successfully balance tension and torsion, bridges that not only stay up but can also carry loads. Show some of you bridge pictures, pointing out beam, arch, suspension, tied arch, cable stay, and truss types.
The weight of a bridge is important. The heavier the bridge, the more of its strength is “wasted” holding itself up. A bridge should be as light as possible but still be able to safely carry loads. The way materials are used and formed makes a big difference in how strong it is. The following demonstrations will give your bridge and tower builders some important information about shapes.
Demonstration
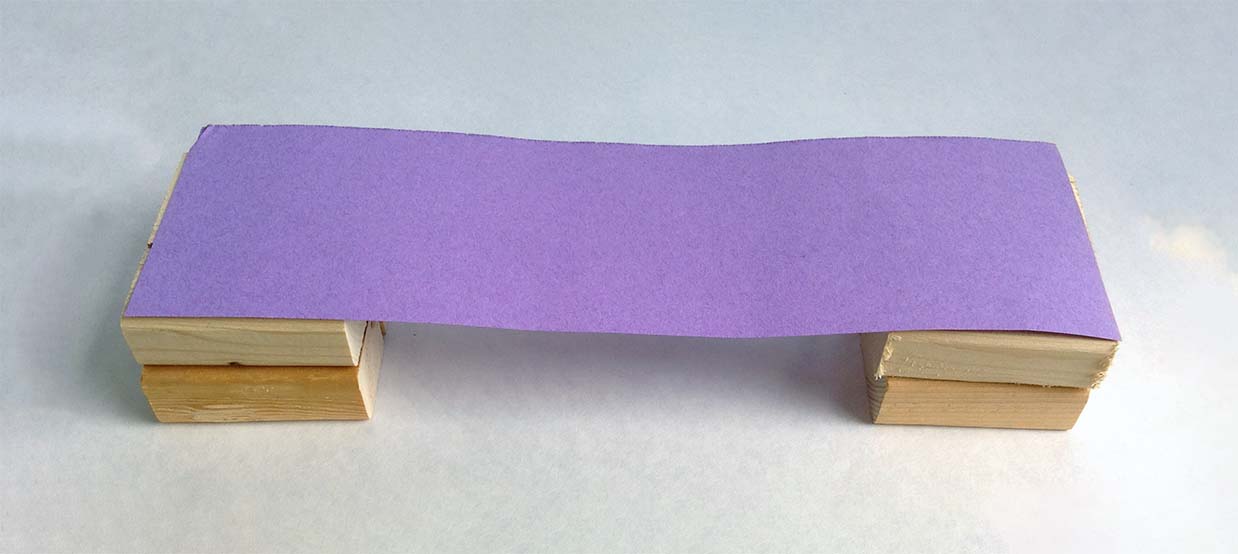
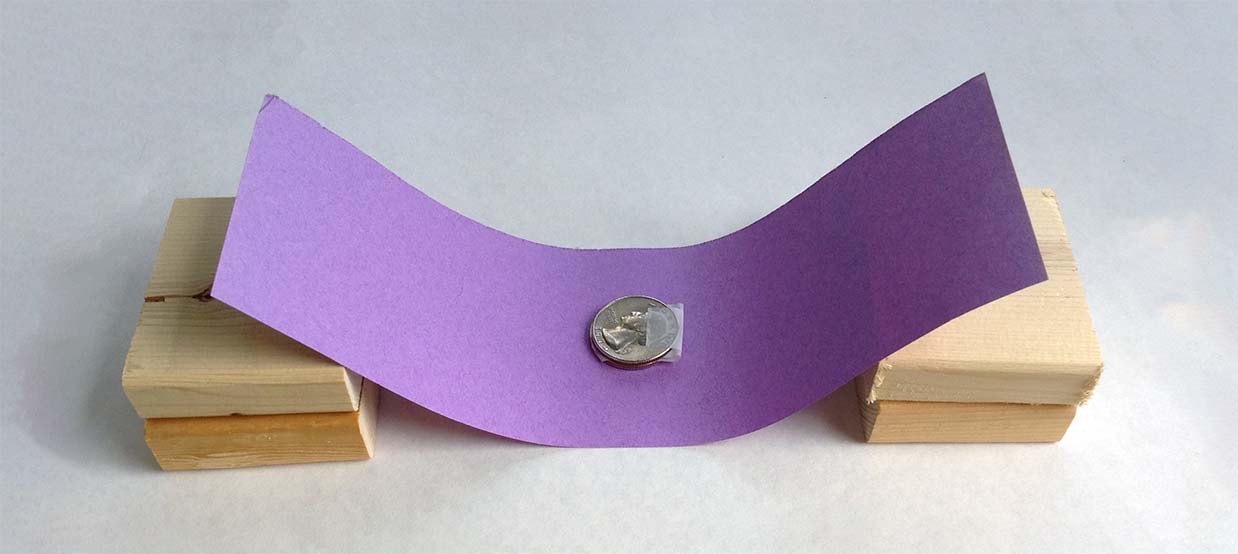
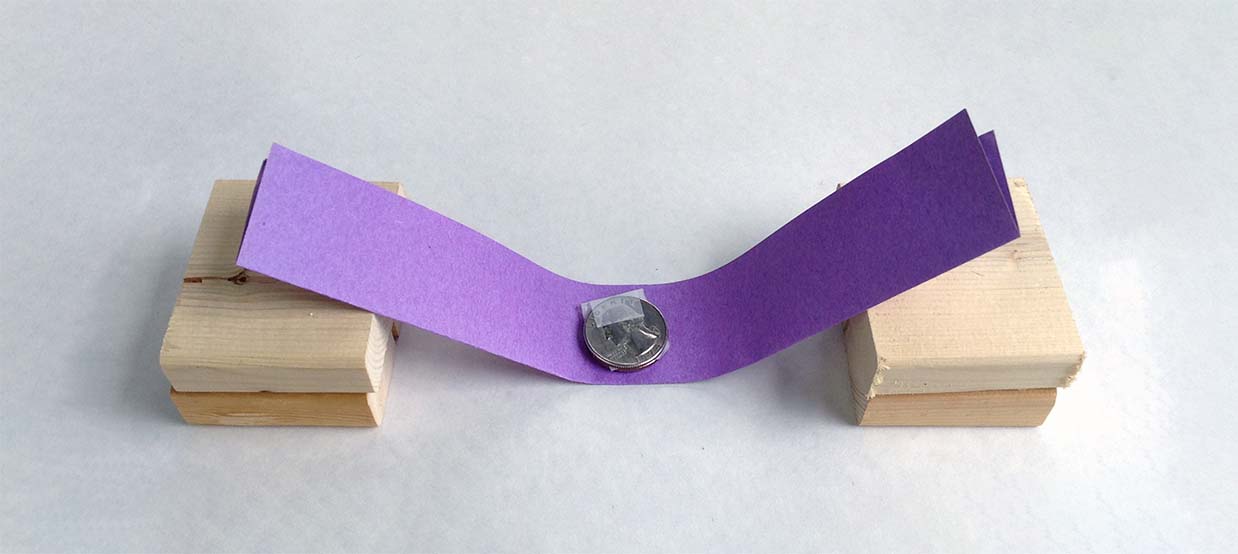
Place two stacks of books or blocks about six inches apart. Lay the unfolded 3″×9″ piece of paper across the gap. Ask a student to place two quarters in the center of the paper. What happened? Show the piece folded into an accordion and explain that it’s the same piece of paper, only folded. Place it across the gap. Ask the group to predict what will happen when two quarters are added, then have another student do so. If desired you can have that student add quarters until the “bridge” fails or you run out of change. Finally show the paper tube and explain that it’s also made from a 3″×9″ inch piece of the same paper. Ask the group to predict what will happen when two quarters are added, then have another student do so by draping the pair of hinged quarters over it.


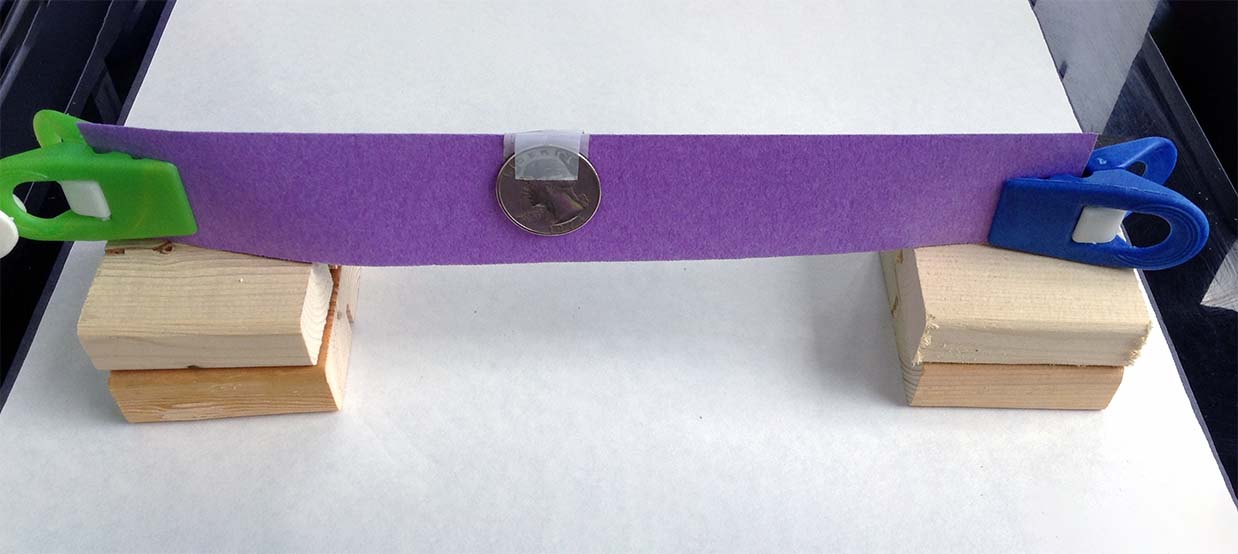
Take the 3″×9″ piece of paper and fold it in half lengthwise. Lay it flat over the gap, and ask the group to predict what will happen when two quarters are added. Select a student to do so. Then put a clip on each end of the paper, and rest it edge down across the gap. You may have to ask someone to hold one or both clips (not the paper itself) if the strip tips over. Ask the group to predict what will happen when two quarters are added now. Select a student to do drape the hinged quarters over the paper “beam”.
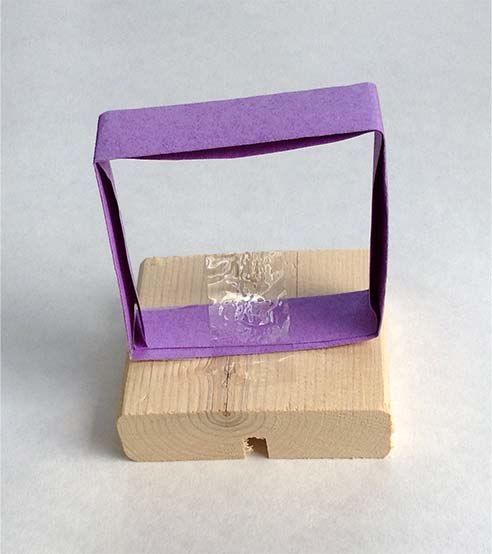
Finally, show the triangle and square. Ask for predictions on which shape can hold the must weight. Tape the square to the table, and ask a student to place two quarters on the top side. Then tape the triangle to the table and drape the quarters over the top vertex. Show the pictures of a truss bridge and the Eiffel Tower. What do the children notice about the way the beams are arranged? They should note that the structures are made of triangles, not squares or rectangles.


Show the challenge sheet. Briefly explain what the bridge deck is, and that it must be at least 2″×10″ with a hole in it to allow for testing. Show the vehicle and explain that it must be able to travel across your bridge, i.e. no paper, chipboard, tape or string blocking its path. Finally, explain that builders can rent clamps, clips, or rubber bands to hold the bridge together while glue dries, but they must be removed before the bridge is tested. Dismiss pairs of children to their stations.
Activity
Allow ten minutes for the introduction, ten for designing and planning, twenty-five for building with the store open, ten more minutes for building with the store closed, and five for closing.
During the building phase volunteers should circulate, prepared to point out bridges that are too short, are missing the hole, or made no allowance for passage of the vehicle. Have a few damp paper towels on hand to quickly mop up glue drips. Monitor the glue bottle sharing.
Use the last five minutes to make sure that each bridge record sheet has the students’ and bridge names on it, and the bridge is marked with the number assigned to each pair of students. Collect the record sheets. Collect the bridges and set them aside to dry.
Seek out and wash off any dripped glue from table tops or trays. End of Day 1.
Day 2
Allow up to five minutes for introduction, 40 minutes for testing and building, 5 minutes to take apart towers and return the pieces to the bags, and 10 minutes to review results.
Preparation
Prepare stations or trays for each pair of students. Include a ruler, pencils, bridge, record sheet, scissors (v2), and bag of tower parts (v1) or paper/cardboard (v2).
Towers, Version 1:
Divide the construction set pieces evenly among the pairs of students. Each pair must receive the same number and type of pieces. Place the pieces in bags, one per team. It can be helpful to write down the contents of the bags.
Towers, Version 2:
Divide the cardboard or paper evenly among the teams. Give each team 12 inches of masking tape to begin.
Bridge Testing:
Remove clamps, clips, and rubber bands from the bridges.
Match record sheets to bridges.
Set up two tables and electronic balance for bridge testing. Keep the plastic cup on hand in case you need to elevate the bridges in order to read the balance display. Weigh and record the weight of the hanger, and the weight of the pail.
Prepare a master record sheet with bridge names and numbers.
Introduction
Today we’ll test the bridges you built (yesterday/last week/last session). You cannot make any changes to your bridges today. While you’re waiting to test and afterwards you have a new challenge. Show the Eiffel Tower picture again. Ask what features the children see. Make sure two items pointed out are the use of triangles and that the tower is widest at the base.
Version 1:
Using only the pieces in the bag you’ll receive, build the tallest tower you can. The tower must be able to stand by itself without leaning against anything. You may not swap or trade pieces with another team. You can take the tower apart and start over again as many times as you want until time is called. If you are using the homemade construction set, show how the pieces are connected, and stress the importance of not creasing pieces, especially at the holes. Explain that if a piece is bent or otherwise damaged it will be taken away, and no replacement part will be given.
Version 2:
Build a tower using the materials at your station. You may not borrow from other teams. You’ll get one foot of masking tape to start, and may ask for more. You cannot get anymore paper or chipboard so plan carefully before you start cutting. The tower must be able to stand by itself without leaning against anything, and cannot be taped to the floor or table.
Dismiss teams to their stations.
Activity
A volunteer or two monitors tower building. For version two, they’ll also provide the initial piece of masking tape, and more as requested. If teams have the option of getting more tape have the volunteers note this on the record sheets. This could serve as a tie breaker, the team using the least amount of tape named victor.
When a team is ready, the volunteer measures and records the tower height on the record sheet. If there are ten or more minutes left teams are to start over (v1) or try to improve on their design (v1 & v2). If the new or improved tower is taller the new height is recorded.
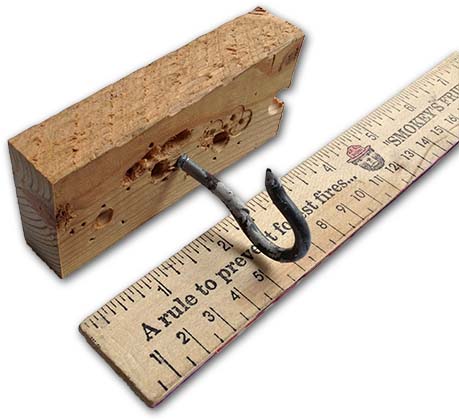
Three adults are useful for the bridge testing station. Weigh the bridge, using the cup if necessary to elevate the bridge so you can read the balance display (don’t forget to tare the balance!). Place the bridge over an eight inch wide gap between two tables. Insert the hanger. If the bridge holds the hanger, suspend the pail from the hook. Hopefully the bridge still stands. Now allow the children to choose and add weights one at a time, reminding them to place, not drop, the weights in the pail. Record the weight at which the bridge fails, or the total weight if it holds everything you have. Keep the students at the test station until they calculate the bridge load-to-weight ratio. While they calculate, the next bridge can be tested.

Review
Which, if any, bridges held all of the weight without breaking? What design features do these bridges have in common? If all bridges failed, consider those that held the most weight.
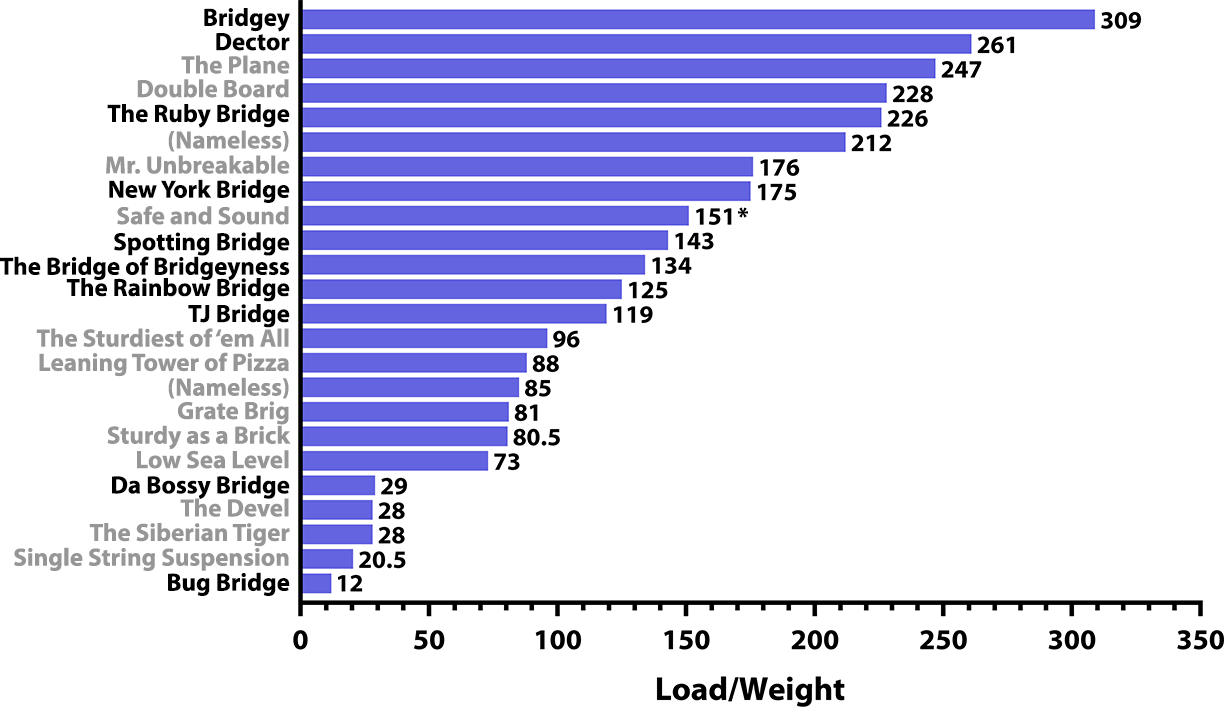
Now consider the load/weight ratio. Which bridge had the highest ratio? What are its design features?
Children do like competition. Display results in table form identified by the names of the bridges based on the total weight held, and in another table based on load/weight ratio. It is not unusual for a bridge that held little weight to rank much higher in load/weight ratio than the load held would suggest. Ask the builders of the tallest tower to explain their strategy as time permits
How did your builders do? Any particularly interesting or amusing designs? Any tweaks to the activity that worked well for you? We’d love to hear from you! Drop us a note or leave a comment!
Header image of the Sydney Harbor Bridge courtesy of Wikimedia Commons.


.jpg)
0 Comments