This fast-paced engineering problem solving exercise is a favorite with elementary school students. It’s also inexpensive, easy to teach, quantitative, can accommodate a lot of kids, and is easy to adjust the difficulty of. The magnets are incidental to the activity — the real goal being a fun way to teach and practice iterative problem solving and design — but we often make it the second half of a two-day one-hour-per-day unit on magnetism. The first day involves stations, each exploring some aspect of magnetism. The game is the second day. This activity is best done in pairs.
Supplies
Reusable
- Building sets (see below)
- Magnets (see below)
- Magnetic discs or paperclips (see below)
- Countdown timer
- Scissors for the store
- Cafeteria trays (optional, but very useful)
- Pencils (1/team + extras)
- A few bowls or similar
Consumable
- String or yarn
- Masking or painter’s tape (preferred) for marking the floor
- Cardboard box (see below)
- Scratch paper
Printable
- Magnet Marks (“money”)
- Test tokens
- Score sheet
- Shopping lists
Building Sets:
The homemade cardboard/brads/dowel/thread spool set works very well. You can also use commercial sets — such as Thames and Kosmos, K’Nex, Tinkertoy, Makeit Toy, STEM Master, Brickyard Bricks to name a few. Whatever you choose, a wheel and axle option is beneficial. If you are using the homemade set you can also provide extra cardboard, scissors, and a hole punch so teams can design their own components.
Magnets:
At least one per team. Important: DO NOT use neodymium magnets! These are much too strong. The best choice is ~ 1.2 inch diameter ceramic (ferrite) ring (donut) magnets typically sold for craft projects. (These are also handy for floating magnet demonstrations.) If you only have magnets without holes, consider tying them in pieces of fabric or plastic film, leaving a string or wire loop at the top.

Magnetic Discs or Paperclips:
At least 200; 300 is even better. If using paperclips, choose No. 1 or No. 3 size. What’s worked best for us are these lightweight metal-rimmed “counting chips” (see photo above) that we were given by a teacher. We are honestly not entirely sure where they come from. If you have access to them, that’s fantastic, but if not, paper clips work almost as well.
Cardboard Box:
The ubiquitous boxes used for photocopier paper are fine, but any box roughly that size or a little bigger works as well. In this age of online shopping and shipping, it shouldn’t be hard to find a suitably large box.
Printables
Printable files for the store money, score sheet, test tokens, and shopping lists can be downloaded using the button below.
Preparation
Make a shopping list based on your particular building materials. A template for the homemade building set is supplied. If you have more magnets than teams give each team one magnet to start, and make the rest available for purchase in the store (“MagMart”). Print one list per team.
Print the score sheet.
Print test tokens, two per team. Instead of the paper “Tesla Tokens” included in the Printables you can use any item like bingo marker disks, pennies, bottle caps, buttons etc.
Print and cut the Magnet Marks (this module’s “money”), ten per team.
Prepare the box. Remove the four top flaps. Cut one 2-2 ½ inch diameter hole in the center of the bottom. Put tape over the seams at the hole’s edges so strings cannot get caught between the bottom flaps. Cut a hole in each side, each a different size and shape. Two of these openings should touch and be open to the floor. An example is shown below.

Place the box bottom-up in a location at least five feet away from walls or immovable structures. Use painter’s tape (masking tape can sometimes leave sticky residues) to mark lines parallel to and three feet away from each side. Scatter the paperclips or magnetic counting chips under the box.
If available, place a table near the box with the timer, bowls, rules, pencil, and scoring sheet.
Set up the store. Mark three feet on the table for ease in measuring the string or yarn.
Prepare a tray for each team with ten Magnet Marks, two test tokens, pencil, shopping list, and scratch paper.
Running the Module
Introduction
If the students are using the homemade building set demonstrate how to slide the dowels into the holes in the cardboard without bending the cardboard. Stress the importance of not creasing the cardboard components.
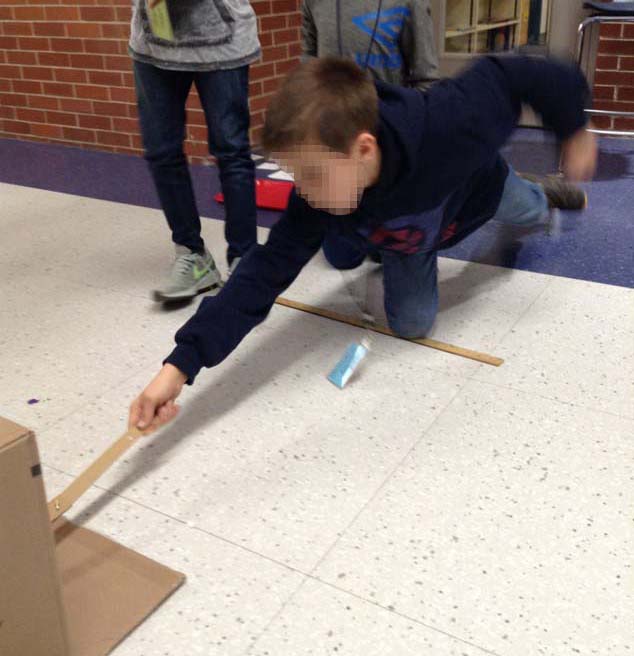
The challenge is to create a device to collect as many paperclips (or disks) as possible in one minute.
Explain the rules:
- Both feet must stay behind the tape lines, but you can reach over the line. No elbows, hands, arms, knees, or tummies can touch the floor between the box and tape line.
- Only paper clips that are outside the box when time is called count; if your magnet is still inside the box when time is called any clips attached to it don’t count.
- You can modify your device as many times as you like, including starting completely over after the first test.
- You only get two chances to test your device, so take your time designing and building.
- You get ten Magnet Marks to buy supplies. It is wise not to spend it all at once.
- Unused materials can be returned for a refund.
- Each device needs a name.
Let students choose partners. This activity is best done in pairs. If you have an odd number of students allow one team of three, no more. If you have a spare middle school volunteer that student could be paired with the odd youngster, but don’t pair a high school student or adult with that child.
Design/Build/Test
Give each pair a tray. Don’t open the store for about ten minutes to encourage children to plan thoughtfully. Close the store ten minutes before the end of the activity. At that time your store volunteer can help at the testing table. Those last minutes of testing can get hectic.
Teams test whenever they are ready. The adult in charge takes the test token, gives the team a bowl, and starts the timer when the team is ready. Monitor the action to make sure feet stay behind the line, and no other body parts touch the floor between the line and the box. Typically, one student uses the device while the other removes paperclips or disks, putting them into the bowl, after each successful attempt. Their turn ends after one minute OR if the magnet falls off/out of the device. (It happens!) The team counts their paperclips under the supervision of a volunteer who records the number, and returns the clips to the box for the next competitors.

At this time the team can go back to the drawing board to improve their device. If they choose not to make changes they must wait until the other teams have a had a first trial before making their second.
If you have adequate numbers of paperclips or disks, especially if the last team wasn’t particularly successful, you can test a second team while the first is counting their take. Only one team may test at a time. Additional volunteers are helpful, both to keep teams waiting to test organized, and speeding up the process of returning paperclips or disks to the box.
If all or most of your teams have tested twice well before the activity ends issue a third test token to all teams. Make sure that any team that hasn’t tested twice yet moves to the front of the line ahead of any teams waiting to test a third time. After their final test, be it second or third, instruct teams to take apart their devices, placing all pieces on their trays. Those students can watch the remaining teams compete, cheering them on to victory.

Conclusion
Stop testing no less than five minutes before your activity ends. While students finish taking apart their devices, complete tallying the paperclip or disk total for each team using only the top two takes unless all teams tested three times. Announce the winners in order, least to most successful. What strategies did the more successful teams employ?
How did your hunters of paper clips do? Any particularly interesting or amusing designs or clever strategies? Did you make any tweaks to the activity that worked well for you? We’d love to hear from you! Drop us a note or leave a comment!


0 Comments