This post details the one-session version of the mechanical weight-lifting variant of the Wind Turbine module (see the Overview Post for the electrical versions). The two-session version can be found here.
Supplies
Disclaimer: We have no financial ties and receive no financial support or free/discounted supplies from any company mentioned in this activity. All recommendation comes from our personal experience.
Wind Turbine(s)
For 24 students:
Minimum = two turbines (teams of four students, three teams per turbine)
Better = three turbines (teams of four students, two teams per turbine)
Best = four turbines (teams of three students, two teams per turbine or pairs of students with three pairs per turbine)
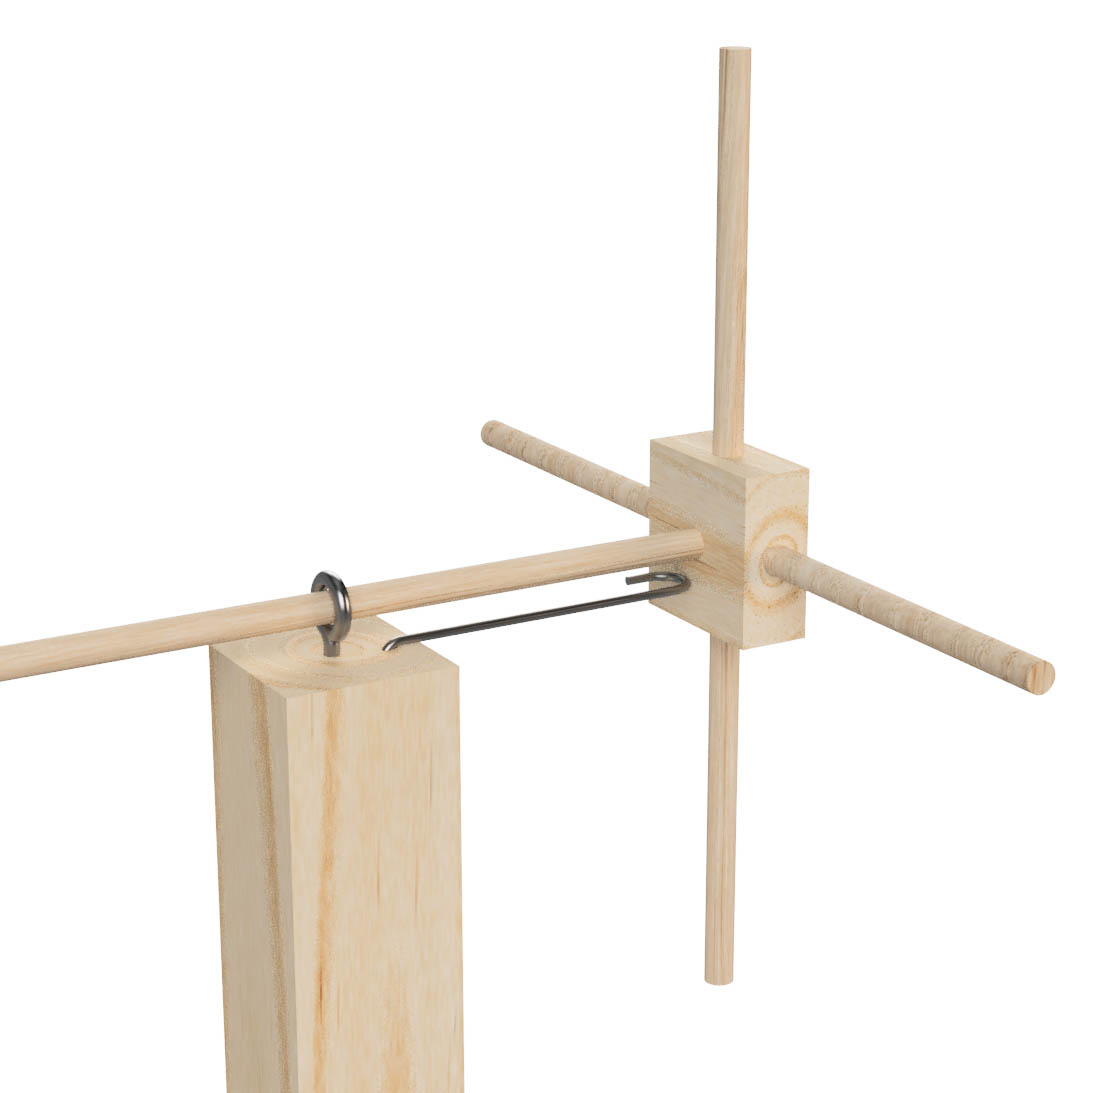
Plans for a mechanical wind turbine are included. You can built it out of nominal 1×2 or 2×2 furring lumber — “economy” grade is fine — or any scrap lumber will do. You will also need two screw eyes, a piece of coat hanger or similar-weight wire, glue, and two clamps to attach the turbine to a stable or counter.
Hubs
One hub per team or pair of students.
Hubs from Tinkertoy or MakeIt Toy sets can be used.
Plans for a four-blade hub/shaft unit for mechanical turbines made from 1×2 lumber and 1/4 inch diameter dowels are included in the downloads.
Fans
One per turbine. The fans should be identical if you plan to compare results of blades tested on different turbines. If they aren’t, and your students are competing to make the best performing blades, you’ll need to retest your top candidates on the same turbine. Both floor fans and box fans work, but you’ll need to put the box fans on a table or counter level with the turbine hub.
Other Supplies
- Tape measure, yard stick, or meter stick — One per turbine
- Pencils — One per team plus extras
- Safety glasses or goggles — One per student and volunteer or several pairs peer turbine. If you don’t have enough for each person, only those wearing eye protection can be anywhere near the spinning turbine. All others must be out of the “line of fire” should a blade come out of the hub or come apart during testing.
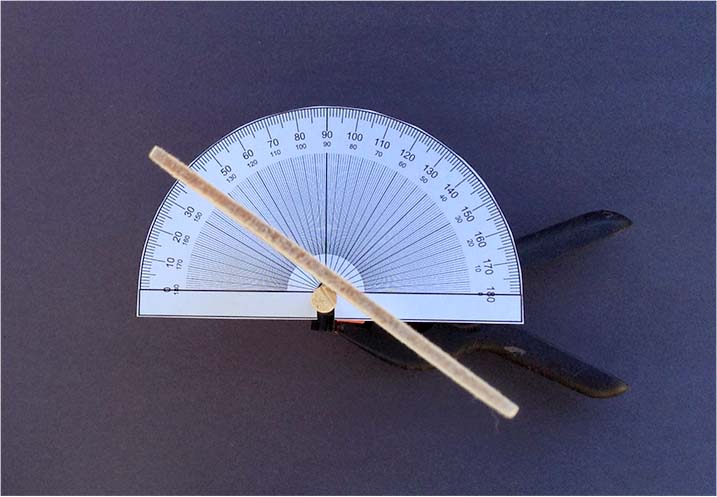
- 0° to 180° protractors — One per team, commercial or homemade (template included)
- Timer — One per turbine, count-up capable
- Assorted MakeIt Toy or Tinkertoy rods — If using MakeIt Toy or Tinkertoy hubs
- Extra dowels ~6 inches (15 cm) long — To augment the commercial rods if using MakeIt Toy or Tinkertoy hubs. 5/16″ for MakeIt Toy (you’ll need masking or painter’s tape, as well).
- Assorted paper and plastic cups — Preferably in multiples of at least four per type, for making “scoop” style blades
- 1/4 Inch handheld hole punch — As many as possible, up to one per team/pair
- Chipboard (cereal box) — For making “scoop” style blades
- Scissors — One per team/pair
- ~2 yards of string — One per turbine
- Small weights — 1 to 5 grams each, about 100 grams total per turbine. Pennies work well.
- Clamps to secure the base to a table or countertop — Two per turbine
- Paper or whiteboard and marker(s)
- Record sheets
- Printed pictures or slide show of wind turbines and windmills, historical and modern (Optional)
Printables
Printable versions of record sheets, protractor templates, turbine plans, and such can be downloaded via the button below.
Preparation
At Home
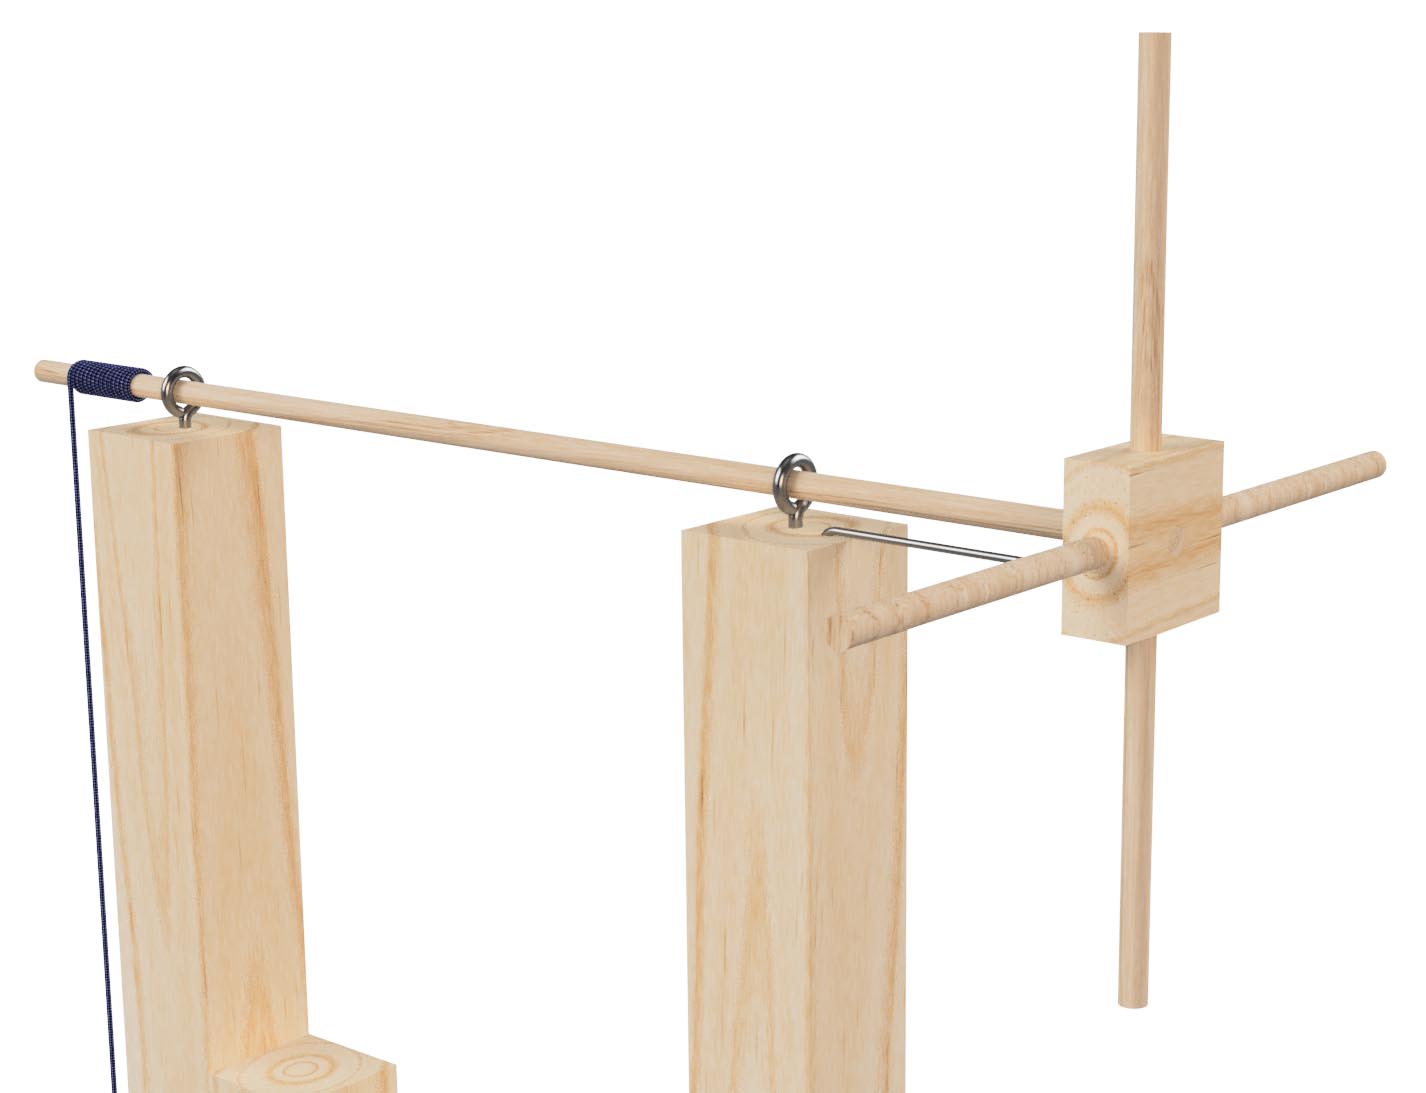
Construct the wind turbine bases (full plans included in downloads).
If you’re not using commercial hubs, construct four-blade hubs/shaft units.
If using 5/16 inch dowels, apply masking or painter’s tape to one end of each dowel. One way is to cut ¼ inch wide strips of tape about 1 ½ inches long. Apply them one at a time over, not around, the end of the dowel. Test between each piece of tape until your dowels fit snugly enough not to fall out when the blades spin, but not so tight that the tape is torn when inserted. Then wrap one piece around the dowel to cover and secure the exposed ends of the tape.
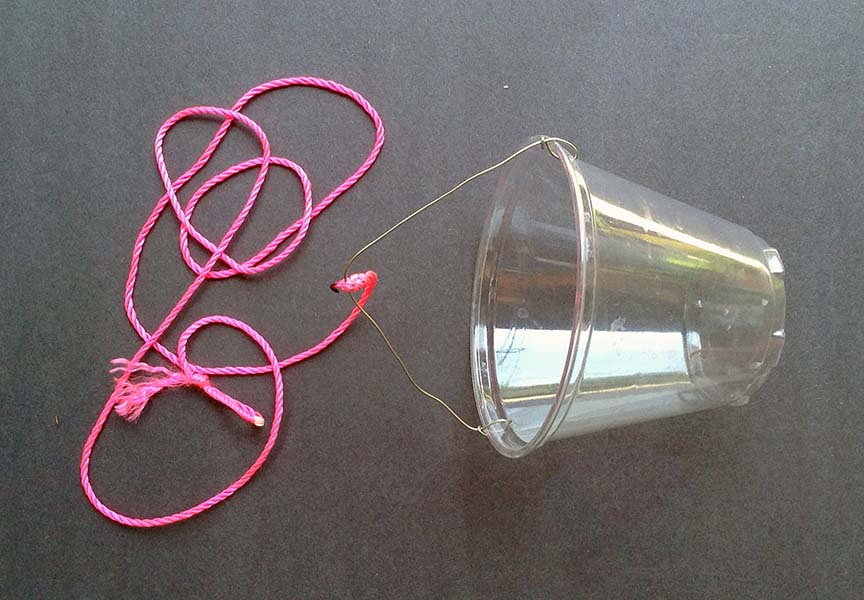
Choose one cup to hold the weights for each turbine. Attach string to each. You can add a wire handle to make a “pail” if desired.
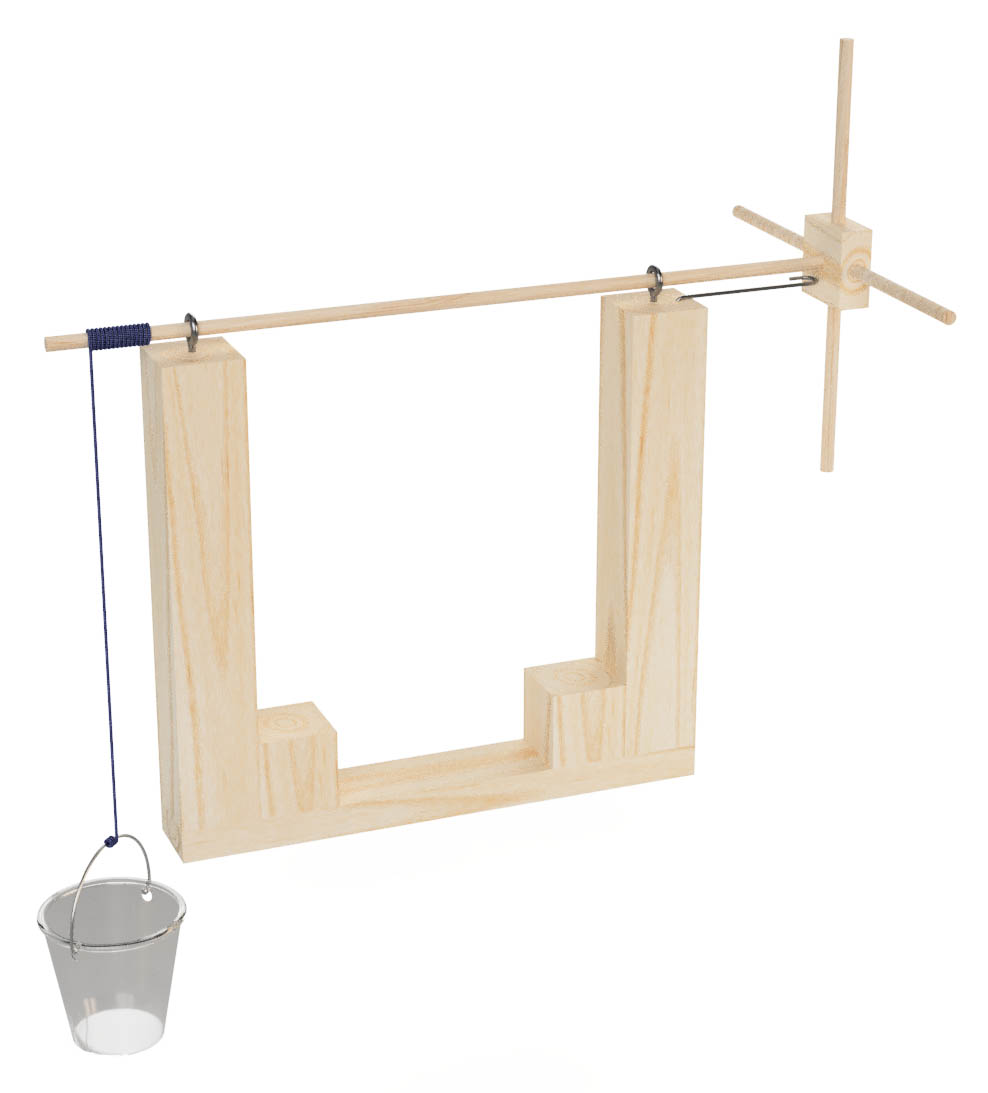
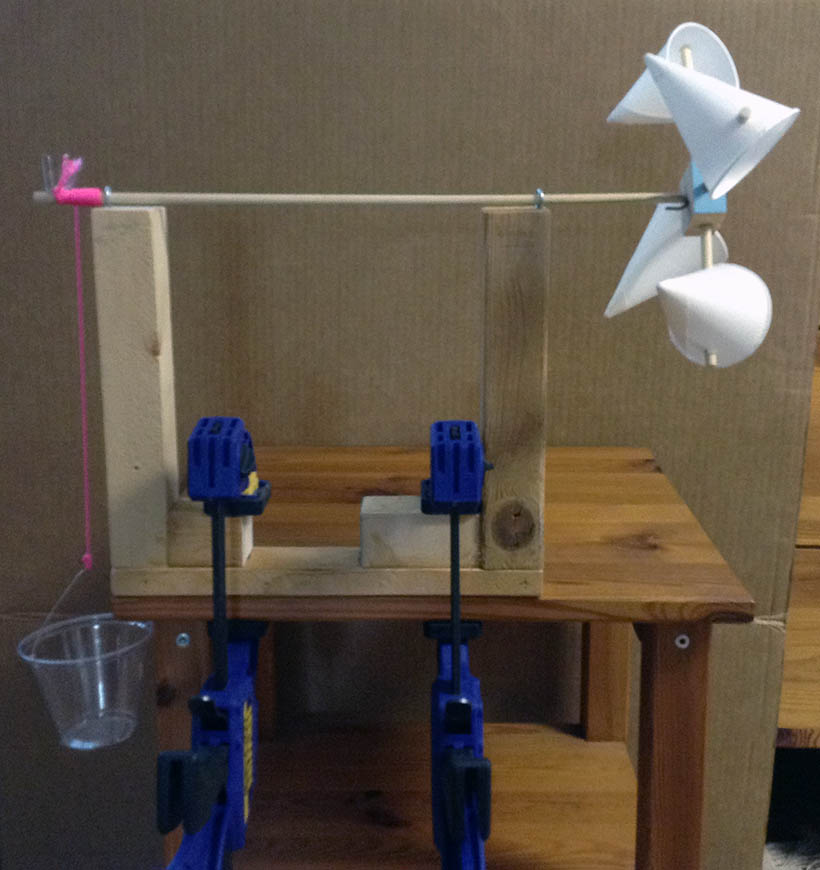 Completed wind turbine, clamped to table.
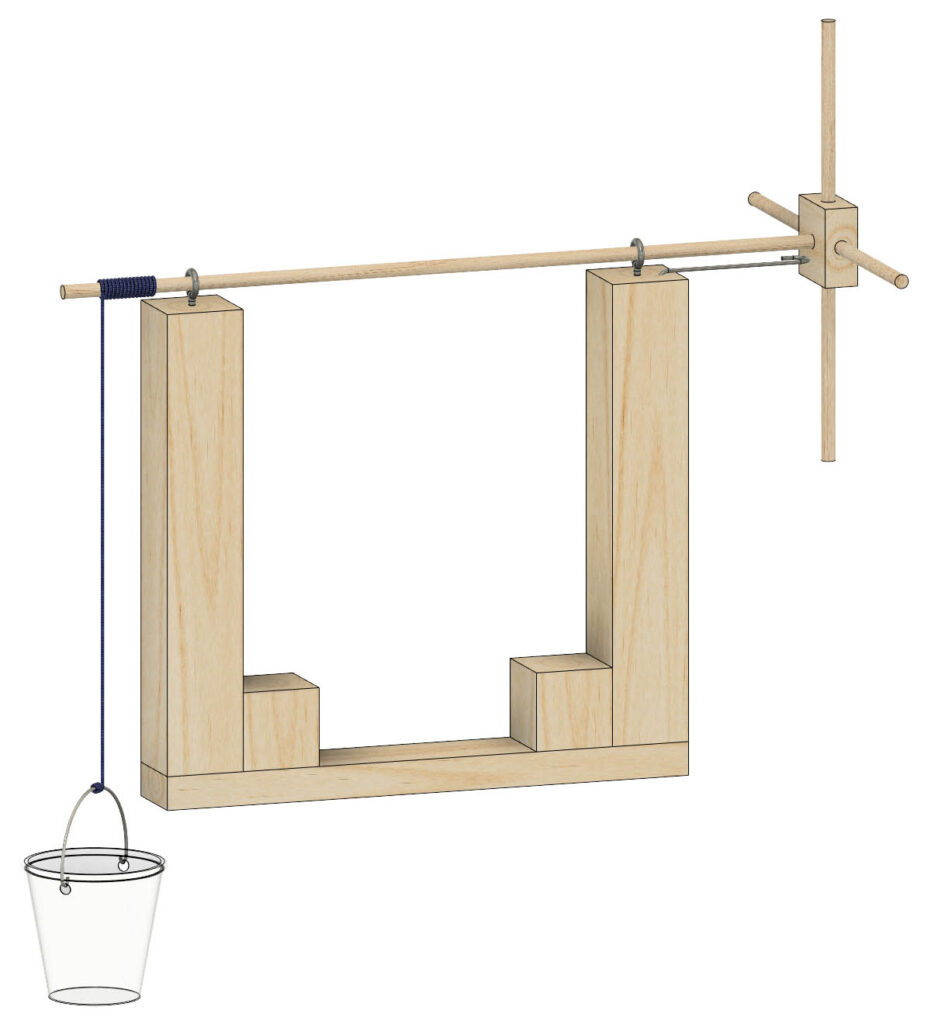 Render of wind turbine, without blades.


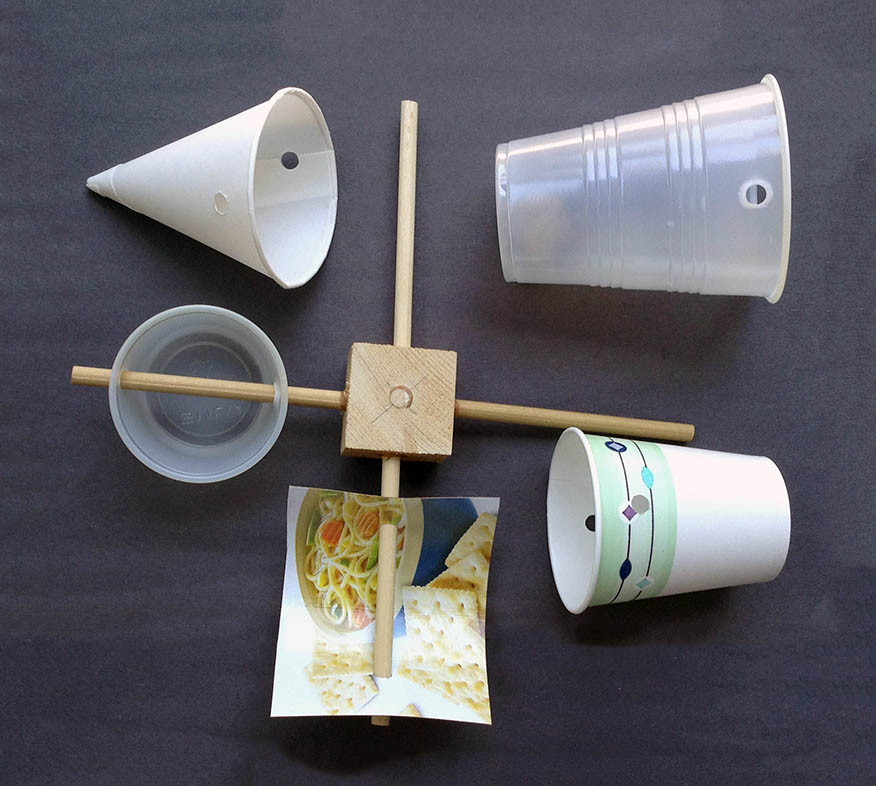
Punch holes in cups, two per cup across from each other just inside the rims. For 5/16 inch dowels and commercial rods, enlarge one side of each hole by nipping out ~ 1/16 inch on one side of each hole with the punch. The photo to the right (or below, depending on screen size) shows some of the many different cups and cardboard pieces we’ve used as “blades” in this activity.
Glue the protractor sheet(s) onto heavy cardstock or thin cardboard. Cut out when dry.
Print record sheets, one per team/pair, and assign a turbine base to each.
Determine the placement of fans and turbines. This importance of this step cannot be over emphasized. The centers of the hubs and the fans must be aligned, and one foot apart. This distance and alignment must be maintained for every test so students can compare results. Attaining this may require liberal use of stacks of books, fans on tables, turbines on the floor, turbines on chairs etc.
Make sure that fans can be plugged in safely. If you must use an extension cord, take steps to prevent people tripping over it. If you are pre-selecting team members (advisable, especially for mixed ages) put team identification slips in the name tag lanyards.
On Site
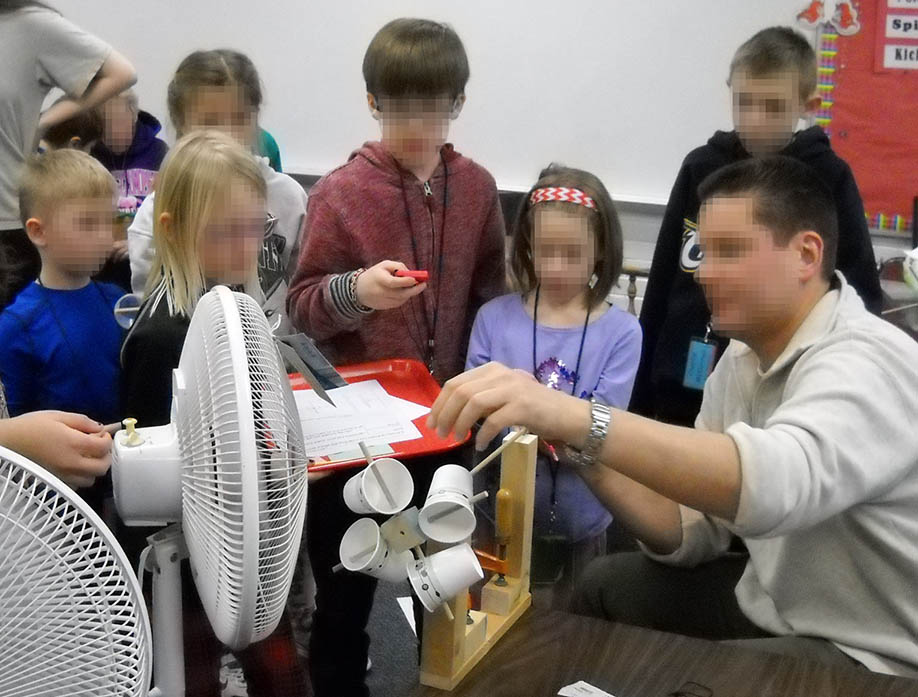
Show your volunteers how to attach toy hubs or insert shaft/hub units, and how to attach the cup and string. The string from the cup should be wound on the shaft so there’s no slack when the cup is resting on the ground before timing begins. Remind them to make sure the hub and fan center are aligned and one foot apart before each trial. Finally, remind them to always wear eye protection, and to make sure children do as well, or are kept out of harm’s way.
Running the Module
Introduction (5 minutes)
The first practical wind power plants were built in Persia (now Iran), around 600 AD. These windmills were used to grind grain or draw up water. (Show pictures if you have them.)

(Left) Model of an ancient Persian panemone-style windmill. Image adapted from Wikimedia Commons.
Torque is rotational force. While linear force is a push or a pull, torque can be thought of as a twist to an object. A weightlifting wind turbine needs to develop torque to lift loads.
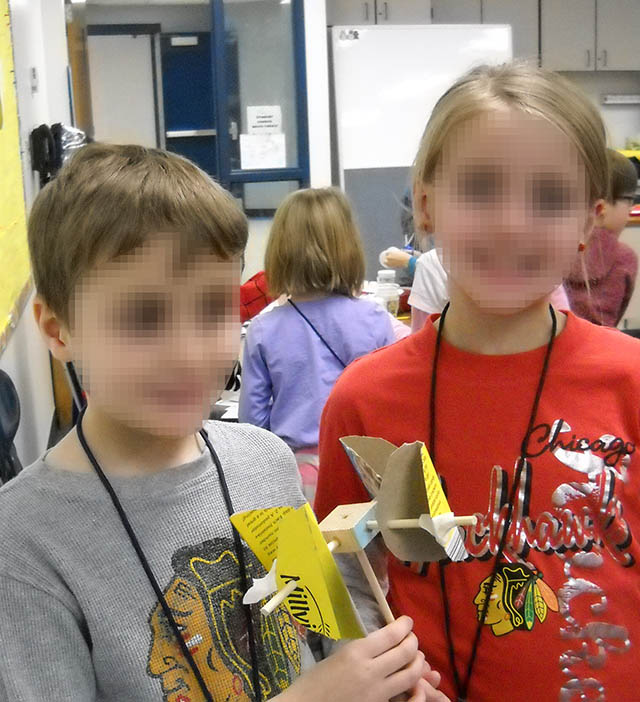
Explain that there are many parameters or variables that determine how well blades produce torque to lift the load. Drag and pitch are two of them. Have children rub their hands together until they feel heat, i.e. the effect of friction. The friction of air against the blades is called drag. Show them how to slide the cups onto shafts, and how to punch holes in chipboard blades, then slide them onto shafts. If using Makeit Toy or Tinkertoy rods, show them how to make a blade by sliding a piece of chipboard into the slot in the rod, and hold it place with another bit of chipboard. (Sometimes you have to peel the chipboard wedge to make it a bit thinner.) The angle the blade makes with the direction of the wind is called pitch. The pitch can be anything between 0 and 90 degrees. Show the students how to estimate pitch using the protractor (shown below).

Explain that they must share cups today, so it’s important to take only what’s needed for each trial, and return it right away when finished. The challenge for today is to pretend each team is a wind turbine company. Their customers want to know what blades to use in order to generate the torque to lift the most weight as quickly as possible.
Teams must use the same turbine base and fan each time.
Challenge Activity
Testing for speed alone provides for the fastest turn around, keeping your students actively engaged. Use an empty cup for speed tests. Provide each team with one of record sheets (see Printables) for recording the results of each trial.
To keep enthusiasm high, let teams post their results by “company” name on posted paper or whiteboard whenever they beat the current best time.
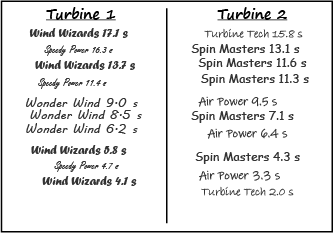
Stop when you have about fifteen minutes left. Ask each team to prepare its fastest blade configuration, and retest these to determine the maximum weight they can lift. Students add weights to the cup as it’s rising, starting over as many times as needed until the limit is reached. For example, if the cup contains 10 grams when it reaches the top return the cup to the floor, restart the fan and add more weight. If the cup holds 25 grams when it reaches the top return the cup to the floor, restart the fan and add more weight. Repeat these steps until the cup and weights no longer rise.

Conclusion
Which company made the fastest blade configuration? Which company’s blade configuration lifted the most weight? Were they the same? What characteristics did successful blades have in common?
How did your young engineers do? Did you make any tweaks to the activity that worked well for you? What blade designs and setups worked best? Any surprises? We’d love to hear from you! Drop us a note or leave a comment!


0 Comments