This post details how to run the workshop version of the electricity-focused variant of the Wind Turbine module. For the other versions , as well as the mechanical variants, see the Overview Post.
Supplies & Preparation
The necessary supplies and preparation instructions for all three “Wind Turbines to Generate Electricity” activities are described in the Supplies and Preparation post.
Running the Module
Before Break
Additional Preparation
Cut dowels into 5-inch lengths for student made blades, six (12-hole hub) or eight (8-hole hub) per team.
Prepare a large piece of paper or whiteboard for teams to post results.
Introduction (5 minutes)
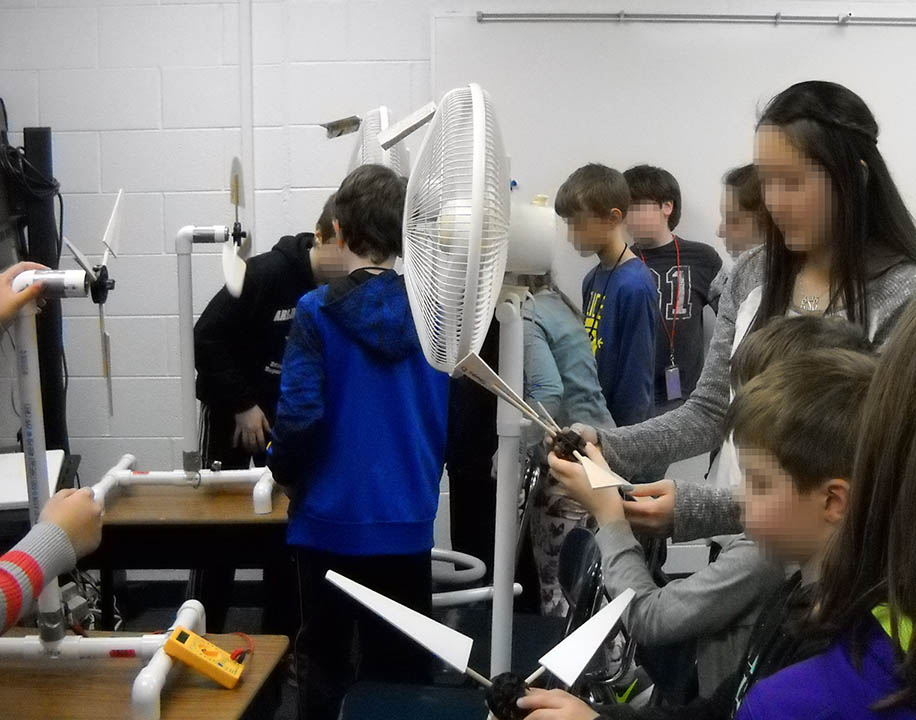
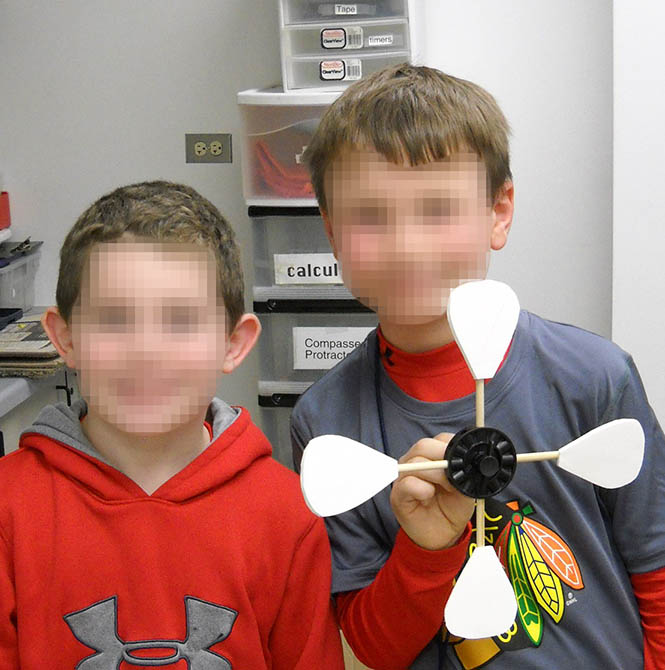
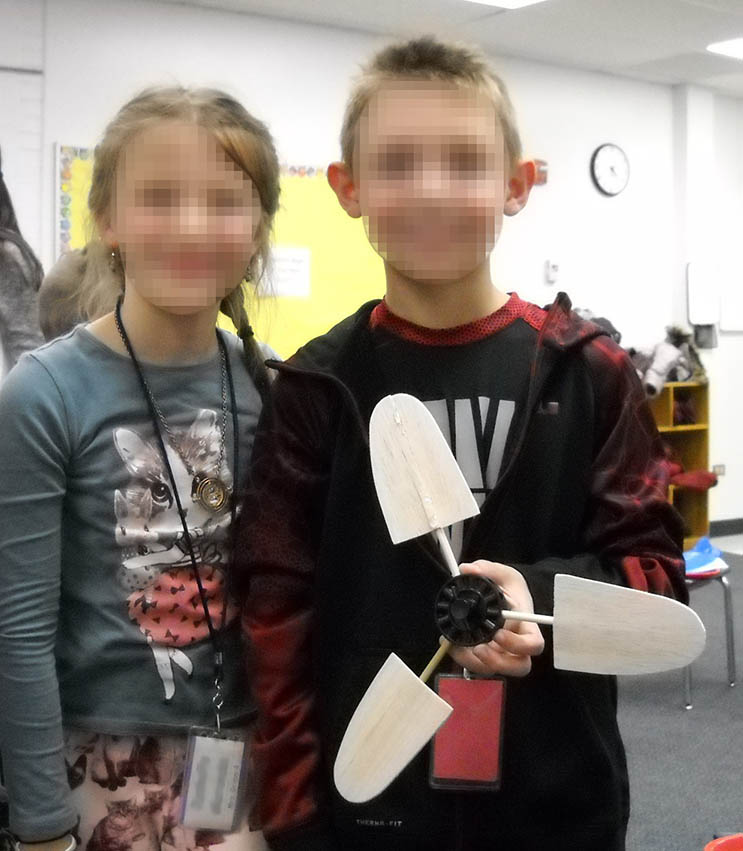
Show one of the turbines with the hub and blades attached.
- These model turbines produce electricity when the rotor of the motor rotates. The faster it rotates, the more electricity is produced. We’ll discuss how this works at our next meeting.
- Measuring voltage can tell us how much electricity is produced. Or Measuring power output can tell us how much electricity is produced. Power (mW or milliwatts) is calculated by multiplying voltage (v or volts) by the current (mA or milliamps).
- The blades catch the wind, causing the hub attached to the motor rotor to spin.
- Demonstrate how to put blades into the hub. Tighten 12-hole hubs just enough to keep blades from flying out.
- There are many parameters or variables that determine how fast a hub with blades spins. Drag, pitch, number of blades, and shape of blades are some of them.
- Have children rub their hands together until they feel heat, i.e. the effect of friction. The friction of air against the blades is called drag. Put dots on one blade, one close to the tip, one close to the blade shaft. Which dot moves fastest when the hub spins? Which dot feels the most drag?
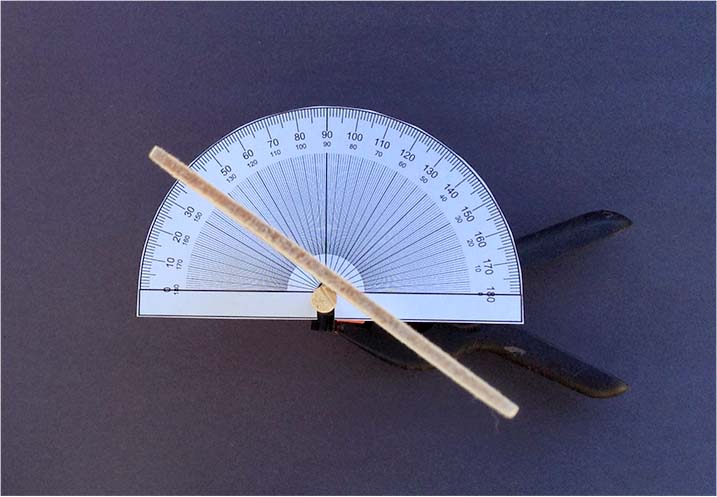
- The angle the blade makes with the direction of the wind is called pitch. The pitch can be anything between 0 and 90 degrees. Show the students how to estimate pitch using the protractor.

- Demonstrate adjusting pitch by loosening the 12-hole hubs slightly and grasping the shaft, not the flat portion of the blade. Twisting the blade alone, especially if the hub has been tightened, inevitably leads to broken blades (balsa) or blades being ripped off of the shafts (foam core board, chipboard, corrugated cardboard.) Blades should be aligned at the desired pitch before inserting into 8-hole hubs. Twisting them after insertion will likely dislodge or tear the tape.
- Explain that they must share blades today, so it’s important to take only the blades needed for each test, and return them right away when finished with that test.
- Explain that there are five tests to explore these parameters or variables. Each test changes only one variable at a time. Do the one marked on the record sheet first, then the other three in any order until time is called.
- Do all tests on the same wind turbine, the one marked on the record sheet.
Tests (35 minutes)
Allow the teams to work on the five tests. Call time after 35 minutes, or when all teams have finished all five tests, whichever comes first. Teams that finish ahead of the others can do additional Test 5 trials.
Design (20 minutes)
Gather the students, seated together by team and turbine. If any teams did not complete Tests 1-4 they should now get that data from another team that used the same turbine.
Hand out the design sheets. Explain that the blade will be cut out and the shaft glued on exactly the way it is drawn on the grid. Display blade materials if more than one will be offered.
Before the break, make sure names are on the record and design sheets, and that they’ve chosen a company name.
Break
The length of time depends on whether or not adults need time to cut the student designed blades. If they are, you’ll have time for a bathroom break, snack, and a game. If not, then use the bathroom and snack time to set up cutting and hot glue stations.
Elementary school students should only cut materials with scissors, not X-Acto or similar blades (needed for foam core board) or saws (needed for balsa). Older students should use blades or saws only if they’ve been instructed on safe use and under direct adult supervision.
After Break
Discussion (10-15 minutes)
Historical Overview with Pictures:
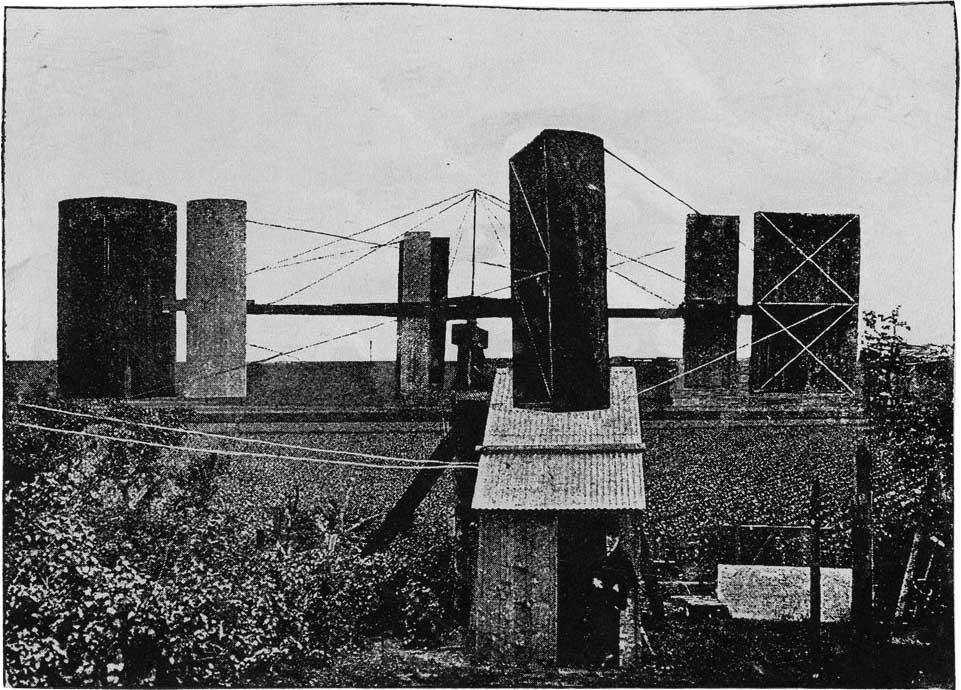
The first practical wind power plants were built in Persia (now Iran), around 600 AD. These windmills were used to grind grain or draw up water. The first electricity-generating wind turbine was a battery charging machine installed in July 1887 by Scottish engineer James Blythe.

By the 1930s, wind generators for electricity were common on farms in the United States by the 1930s, where electrical distribution systems had not yet been installed. Beginning with anti-nuclear protests in the 1970s and concerns over climate change, large-scale wind generation of electricity grew rapidly.
Description or Demonstration of How a Turbine Generates Electricity:
Have one of your wind turbines with a hub and blades on hand.
Explain that a coil of copper rotating in a magnetic field produces electric current. This is called electromagnetic induction, and was discovered in 1831 by the English scientist Michael Faraday. The faster the coil of copper spins the more electricity is produced. In a typical brushed DC electric motor, like the small hobby motors used in this activity’s wind turbines, the copper coils are wound around an inner shaft (rotor) that can spin inside the magnetic field generated by stationary magnets (stator) attached to the motor case:
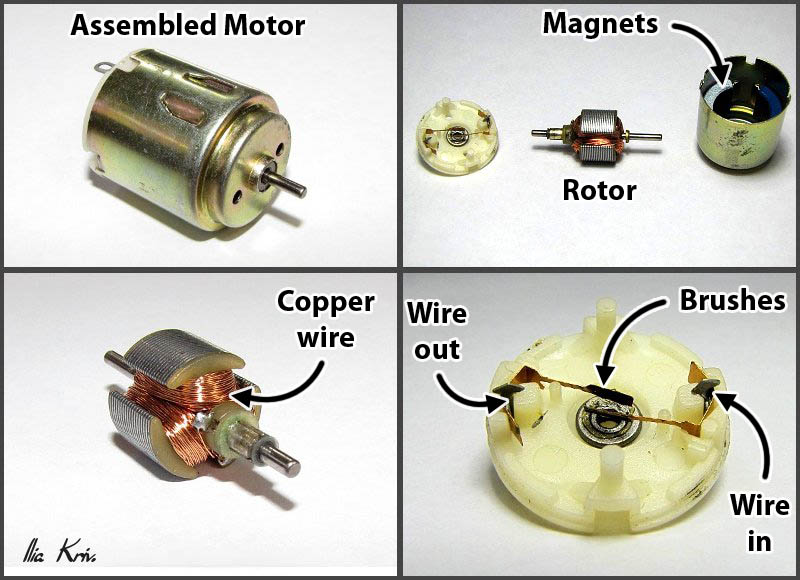
This is how turbines make electricity when wind, waves, falling water, or steam in power plants turn blades attached to rotors. (This process is done in reverse when using them as motors: electric current is applied to the rotor, causing the copper coil to spin, turning the rotor into a drive shaft.)
Replace the batteries with your multimeter (set at 20 V) and spin the blades using the fan at low speed. Then spin the blades at high speed. What produced more electricity, high or low speed? Did the sets of blades that spun quickly last time produce more electricity?
If you send electric current to that same coil within the magnetic field it will spin. This is how many electric motors work. Demonstrate this by connecting a battery box to one of your wind turbines (with blades attached).
Children may ask why the giant wind turbines they may have seen spin quite slowly. (You can find rather spectacular clips on YouTube of giant turbines that spun too fast with alarming and costly outcomes. Your students would enjoy watching some of these.) Giant turbines don’t need to spin fast because they use gear boxes so that that every time the hub goes around once the rotor typically revolves 100 times. (show a picture of gear ratios or a model if you have one.) Giant turbines have brakes to slow or stop them altogether in high winds.
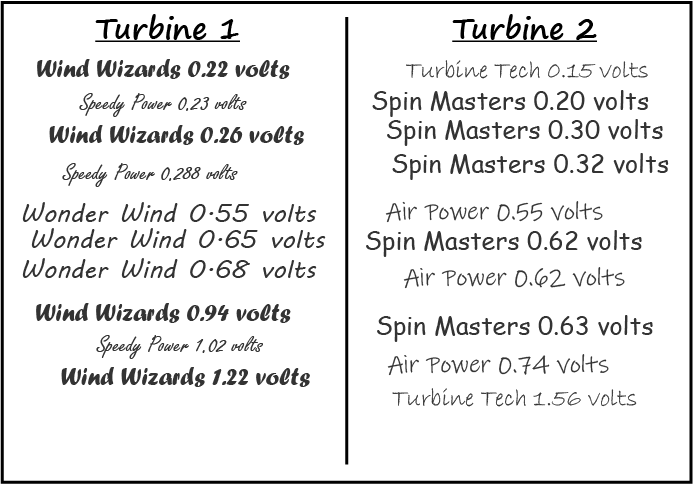
Return the record sheets to each team. Ask teams about the trends they saw at the last meeting with the blade experiments. How did number of blades and pitch effect output? What about shape, surface area, and distance from the hub effects on output?
Challenge Activity
Teams will now prepare the blades they designed. Distribute adult cut blades to teams or, if students are cutting out the blades, have them trace their pattern onto the material of choice. Inspect before they start cutting to avoid waste, especially with more expensive materials like balsa or foam core. Allow students to glue the shafts to blades with hot glue.
If using 8-hole hubs demonstrate how to modify dowels with tape. Students can do this step.
Now teams maximize the electrical output of those blades. Remind students to change only one variable at a time for best results. Teams test their original design and configuration, then continue to adjust and test until time is called. Teams should use the same turbine for each trial.
If your workshop is three hours or longer in duration you should have time for teams to make a second set of blades. Three hours would be a too long for most elementary school aged children.
To keep enthusiasm high let teams post their results by “company” name on posted paper or whiteboard whenever they beat the current best result, voltage or power as applicable.
If necessary, stop a few minutes early to retest the top configuration from each turbine on a single turbine to determine the overall winner.
Close (5-10 minutes)
Announce the winning company.
Discuss which blade designs and configurations generated the most electricity. What aspects did they have in common? What did the students find surprising or unexpected? What changes would they make if they had time to design another set of blades?
How did your young engineers do? Did you make any tweaks to the activity that worked well for you? What blade designs and setups worked best? Any surprises? We’d love to hear from you! Drop us a note or leave a comment!


0 Comments